5 Wait for the printer to finish downloading the applications list.
Note: This list is downloaded from the applications available on the computer. Make sure a photo-editing
application is installed on the computer.
6 From the list of applications, press the arrow buttons until the application that you want appears.
7 Press .
The scanned image is sent to the photo-editing application that you selected.
Scanning to a computer over a network
1 Make sure that:
• The printer is connected to a network through a print server or through a wireless network connection.
• The printer, the print server (if used), and the computer receiving the scanned image are all turned on.
• The printer is configured to scan over a network.
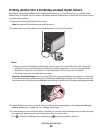
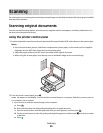
2 Load an original document faceup into the Automatic Document Feeder (ADF) or facedown on the scanner glass.
Notes:
• Do not load postcards, photos, small items, transparencies, photo paper, or thin media (such as magazine
clippings) into the ADF. Place these items on the scanner glass.
• Adjust the paper guide on the ADF tray to the width of the original document.
• When using the scanner glass, close the top cover to avoid dark edges on the scanned image.
3 From the printer control panel, press .
4 Press the arrow buttons until Network appears, and then press .
5 If prompted, press the arrow buttons to select the computer name of the network computer where you want to
send the scanned image, and then press
.
Notes:
• You may be prompted to enter a PIN if the computer requires it. To assign a computer name and a PIN to the
network computer, see the Help for the printer software associated with your operating system.
• If your printer has a numeric keypad, enter the PIN using the keypad, and then press .
• If your printer does not have a numeric keypad, use the arrow buttons to decrease or increase the value for
each digit (the default value is 0000) in the PIN, and then press each time you select a digit.
6 Wait until the printer has finished downloading the scan applications list.
7 Press the arrow buttons until the application that you want appears, and then press .
8 Press .
Canceling scan jobs
Using the printer control panel
To cancel a scan job started in the printer control panel, press .
Scanning
96


