Scanning to a PC or USB flash memory device
51
6
Scanning to a PC or USB flash memory device
The MFP scanner lets you scan documents directly to your PC or a USB flash memory device.
Your computer does not have to be directly connected to the MFP for you to receive Scan to PC images. You can scan the
document back to your computer over the network by creating a scan profile on your computer and then downloading the
profile to the MFP.
For more information or detailed instructions, select one of the following:
Create a scan to PC profile
1 Type the IP address of the MFP in the URL field of your browser, and then press Enter.
If the Java applet screen appears, click Yes.
2 Click Scan Profile.
3 Click Create Scan Profile.
4 Select your scan settings, and then click Next.
5 Select a location for saving the scanned output file somewhere on your computer.
6 Enter a profile name.
The profile name is the name that will appear on the SCAN PROFILE list on the MFP control panel.
7 Click Submit.
8 Review the instructions on the Scan to PC screen.
A shortcut number was automatically assigned when you clicked Submit. You can use this shortcut number when
you are ready to scan your documents.
a Go to the MFP, and place your original document in the automatic document feeder face-up, long-edge first.
b Press # followed by the shortcut number on the keypad, or touch Profiles on the home screen.
c After you enter the shortcut number, the scanner will scan and send the document to the directory or
application you specified. If you touch Profiles on the home screen, locate your shortcut on the list.
9 Return to your computer to view your file.
Your output file is saved in the location you specified or launched in the application you specified.
Create a scan to PC profile
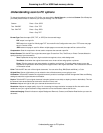
Understanding scan to PC options
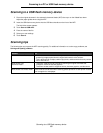
Scanning to a USB flash memory device
Scanning tips


