


40
Recording the image
When you wish to record the image of the display to a PC-CARD.
1. In the PCV main window choose [Select card drive...] under the [Option] menu and then choose
the PC-CARD drive.
2. Choose [New presentation...] under the [File] menu.
The new presentation window will open.
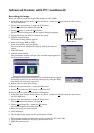
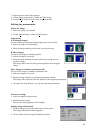
3. Choose [Capture...] under the [Tool] menu.
The PCV windows disappear and the capture dialog box appears.
4. Display the image you wish to record on the screen.
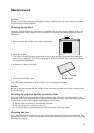
5. Click the capture button.
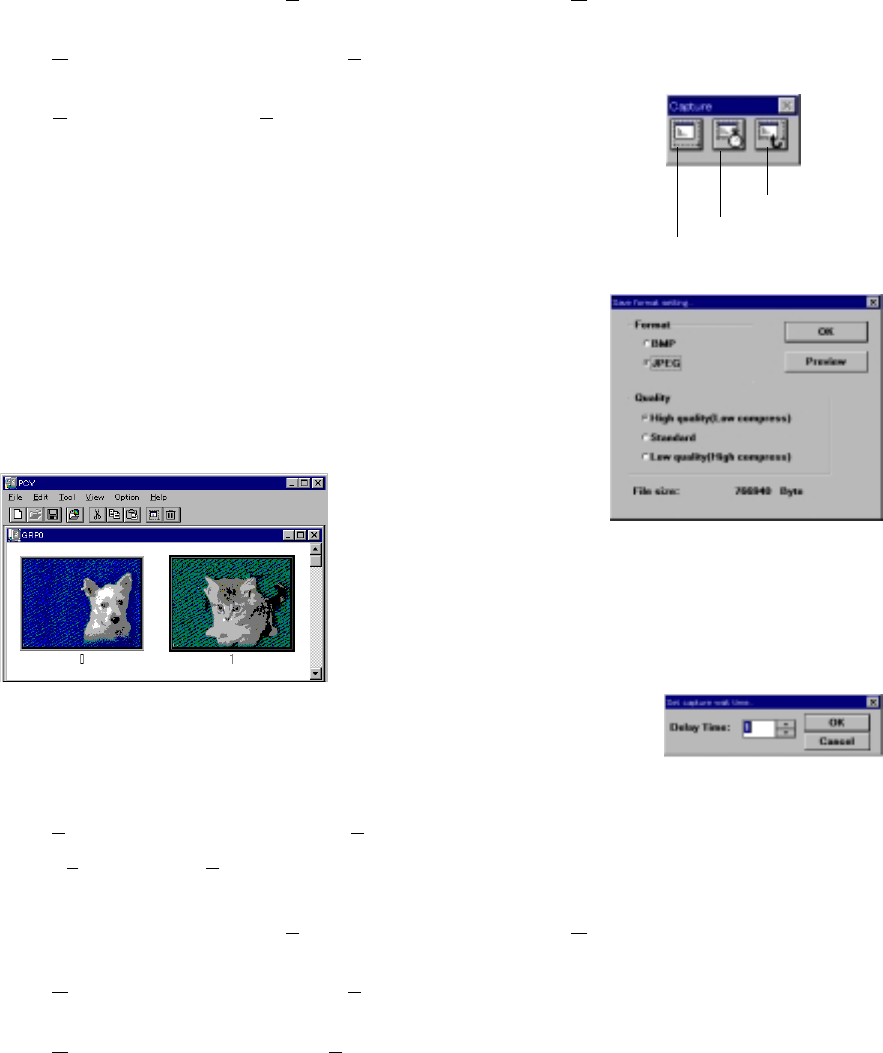
The Format setting window appears.
6. Select the Format, BMP or JPEG.
If you select JPEG, select the Quality.
You can confirm the compressed image by clicking the Preview
button.
7. Click OK button.
8. Click the return button.
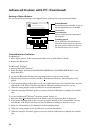
The presentation window will open. The recorded image appears on
the presentation window.
Depending on the personal computer, the recorded image can appear
incorrectly. In this case, set the delay time longer by using the Delay
time dialog box and repeat steps 5 to 7.
9. Repeat steps 4 to 8 for other images.
10
. Choose [Save presentation...] under the [File] menu.
11.
Choose [Exit] under the [File] menu to quit from PCV.
When you wish to record the image from existing files.
1. In the PCV main window choose [Select card drive...] under the [Option] menu and then choose
the PC-CARD drive.
2. Choose [New presentation...] under the [File] menu.
The new presentation window will open.
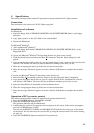
3. Choose [Open image file...] under the [File] menu.
The list box displays the names of the files.
4. Select the image you wish to record.
5. Click OK button.
6. The recorded image appears on the presentation window.
• The maximum number of images that can be recorded to a PC card is 160.
• The maximum number for the group (presentation) is 99.
• JPEG file cannot access.
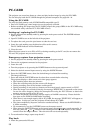
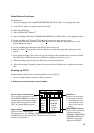
Return button
Delay time button
Capture button
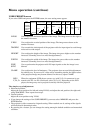
Advanced feature with PC (continued)