


43
Installation of software
For Macintosh
1. Insert the floppy disk of "PROJECTOR DRIVER (2/5) PCGC (Mac)" to the floppy disk drive.
2. Copy "PCGC” folder to anywhere on the hard disk.
For Microsoft
®
Windows
®
1. Start up Microsoft
®
Windows
®
.
2. Insert the floppy disk labeled "PROJECTOR DRIVER (1/5) PCGC (Win)" to the floppy disk drive.
If you use the Microsoft
®
Windows
®
95 Operating System or a more recent version
3. Click the [Start] button and select the [Run (R)] command. Then the [Run] dialog box is dis-
played. Move onto step 4.
If you use the Microsoft
®
Windows
®
Operating system Version 3.1
3. Select the [Run (R)] command on the icon menu so that the dialog box [Run] dialog box is dis-
played.
4. If you insert the floppy disk to drive A, type [A:\Setup] in the "command line" text box and click
the "OK" button. The letter [A] may be different according to the drive you use.
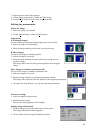
5. When the setup program starts up, follow the on-screen instructions.
6. When the message “Finished” appears on screen, click the [OK] button to complete the installa-
tion.
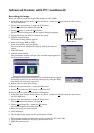
Starting up PCGC
Double click the [PCGC] icon in the setup folder to start up PCGC.
• Do not use SpacePointer during the PCGC operation.
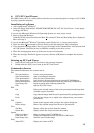
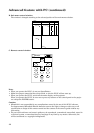
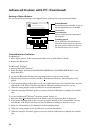
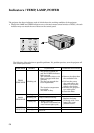
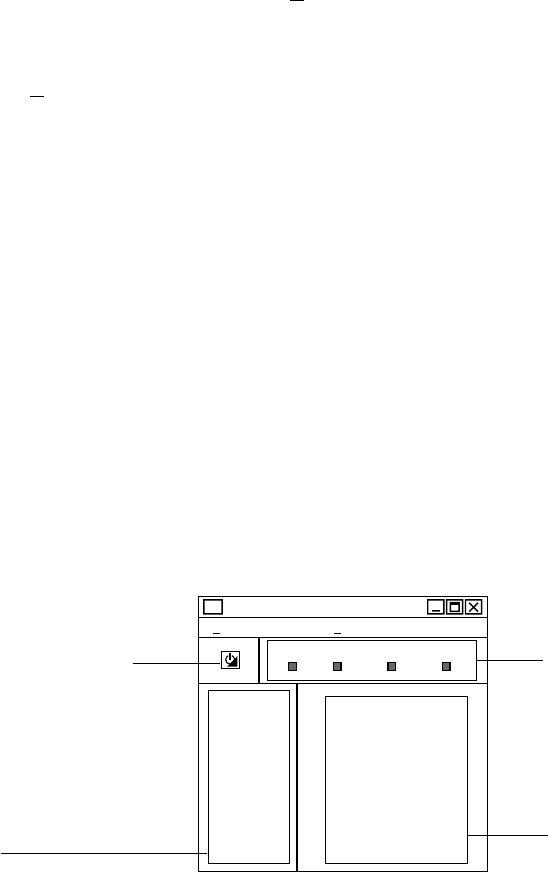
A. Indicator and main menu control window
VIDEO1
LAMP
TEMP
CARD1
VIDEO2
RGB1
RGB2
PC1
PC2
NORMAL
ENHANCED
POINTER
AUDIO
OPTION
QUIT
CARD2
File
PCGC
Window Help
Indicators
(Same as on the projec-
tor. See pages 8 and 9.)
• Each indicator may
not match the one of
those on the control
panel.
Input selector
Click to select an input source.
The input sources are; VIDEO1, VIDEO2, RGB1, RGB2, PC1
and PC2. You can only select PC1 or PC2 when the PC card is
inserted in the projector.
Power button and indicator
Use to turn the projector on or off
when MAIN POWER is on. When in
standby mode, this indicator lights
up red. When the projector is fully
“ON”, the button lights up green.
Main MENU selector
Click to select sub menu.
The sub menus are
NORMAL, ENHANCED,
POINTER, AUDIO and
OPTION. To quit this
software click QUIT.