


PH50, XL50, XL21 series Set-up and Installation Manual
10
1.2.5. Cube stacking (for
R
R
e
e
a
a
r
r
)
1.2.5.1. Assembling the base stands and cubes
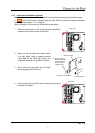
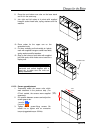
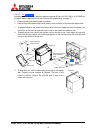
1. Assemble base stands.
2. Adjust level adjusters to make the base stand both level
and plumb by means of a spirit level.
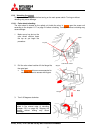
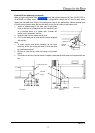
3. Loosen 4 screen-fixing screws per unit shown
with arrow lines in the right figure with an Allen
wrench (5 mm) to remove the screen units
from all cubes to be installed. (This applies to
5
5
0
0
”
”, which is supplied with the screen fitted).
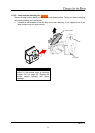
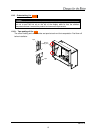
4.
6
6
7
7
”
”
P
P
H
H
5
5
0
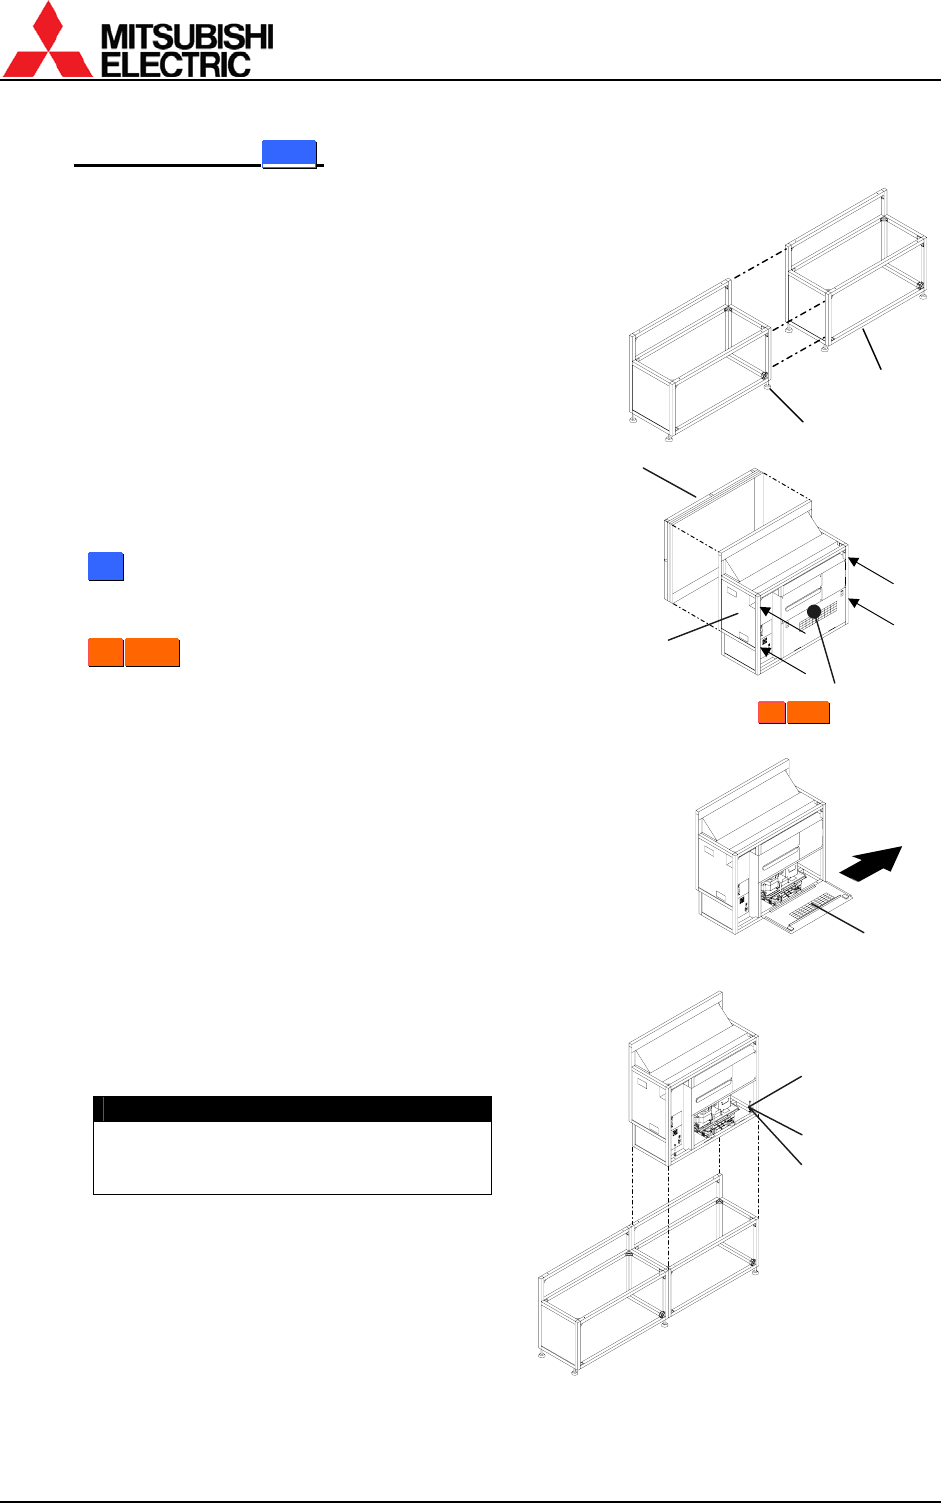
0: Turn a center screw in the lower
door 90 degrees anti-clockwise to unlock with
an Allen wrench (4mm).
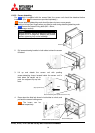
5. Open the lower door 90 degrees by pushing
down the handles. And then slide it to right to
detach. The door cannot be detached other
than 90 degrees opening position.
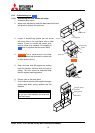
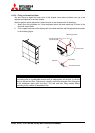
6. Place a cube on the base stand.
7. Fix the cube at 4 points with supplied hexagon
socket head bolts, spring washers and flat
washers.
Caution
When holding up a cube, be careful not
to put your hand between the cube and
the base stand.
Lower door
Hexagon socket
head bolt
Base stands
Level adjusters
Screen unit
Cube unit
Flat washer
Spring washer
Screen-fixing
screws
Center screw
(
6
6
7
7
”
”
P
P
H
H
5
5
0
0)