


PH50, XL50, XL21 series Set-up and Installation Manual
82
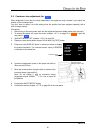
2.3. Focus adjustment
This adjustment is normally unnecessary.
You can adjust the lens focus when it is soft.
[Procedure]
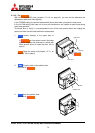
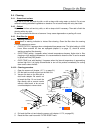
1. Display the crosshatch pattern by pressing [TEST] button twice.
2. To access the optical unit, open the screen (chapter 1.2.7.1, on page 21) in
F
F
r
r
o
o
n
n
t
t or open the
rear panels in
R
R
e
e
a
a
r
r.
3.
X
X
G
G
A
A
R
R
e
e
a
a
r
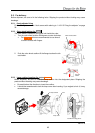
r: Remove the band that fastens the accordion hose to the lens.
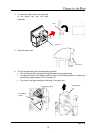
4.
X
X
G
G
A
A: Loosen the lens hood fixing screw.
5.
X
X
G
G
A
A: Loosen the two focus lock screws.
S
S
X
X
G
G
A
A
+
+: Loosen the two lens fixing screws and the ring fixing screw.
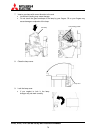
6. Turn the focus ring to focus on the center of the screen.
7.
X
X
G
G
A
A: Turn the lens hood to align the position not to shade the image.
8. Turn the focus ring to adjust the focus with balance on the whole screen.
9.
X
X
G
G
A
A: Turn the lens hood to align the position not to shade the image again.
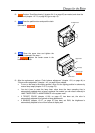
10. Fix the focus lock screws (suggested torque: 0.38Nm
+/-0.03
). Be careful not to stress too much on
the lens.
11.
X
X
G
G
A
A: Fix the lens hood fixing screw (suggested torque: 0.15Nm
+/-0.02
).
12.
X
X
G
G
A
A
R
R
e
e
a
a
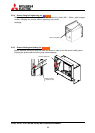
r
r: Put back the accordion hose and tighten the fixing band.
13. Put back the rear panels or the screen unit.
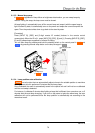
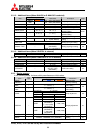
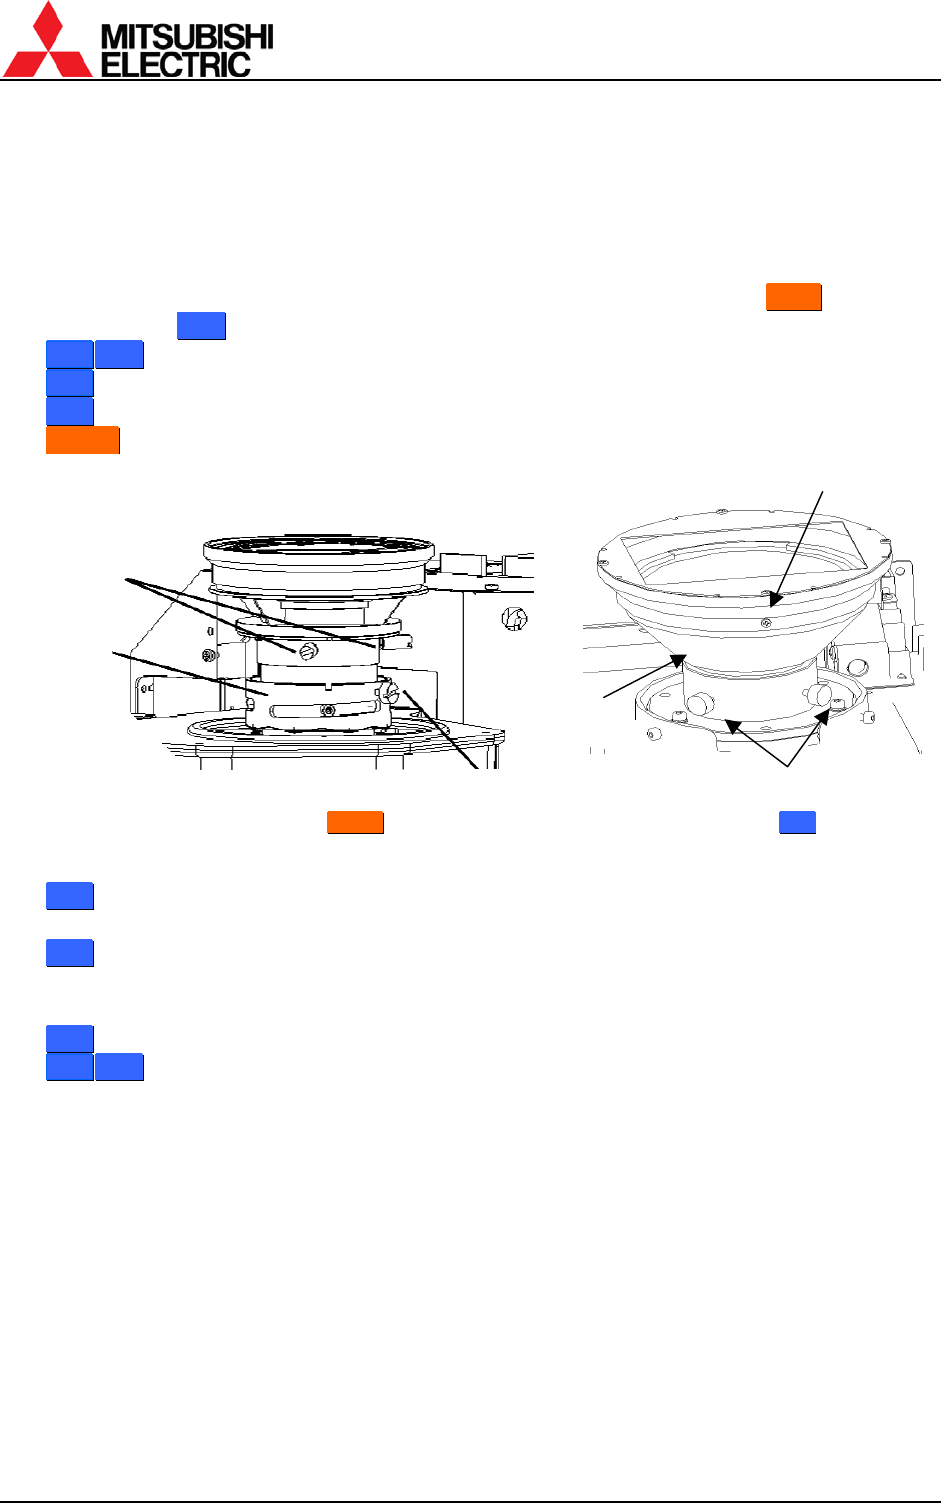
For
X
X
G
G
A
A For
S
S
X
X
G
G
A
A
+
+
Ring fixing screw
Lens fixing screw
Focus ring
Lens hood fixing screw
Focus lock screw
Focus ring