


Address Book 71
P0911958 Issue 01 Enterprise Edge 2.0 Personal Call Manager User Guide
Moving a contact
Contacts can be moved from one folder to another to help organize the Address
Book. When you move a contact, the contact does not remain in the original folder.
To move a contact using drag and drop, the contact must be visible in the List View
and the folder you are moving it to must be visible in the Tree View. To move a
contact:
1. Drag the contact you want to copy to the new folder.
To move a contact using the toolbar:
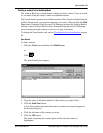
1. Click the contact you want to move.
2. Click .
The icon for the contact dims.
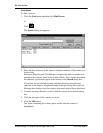
3. Open the folder you want to move the contact into.
The contents of the folder appear in the List View box.
4. Click .
The contact is moved to the new folder.
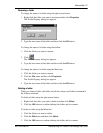
To move a contact using the right mouse button:
1. Right-click the contact you want to move and then click Cut.
The icon for the contact dims.
2. Open the folder you want to move the contact into.
The contents of the folder appear in the List View box.
3. Right-click an open area in the folder and then click Paste.
The contact is moved to the new folder.
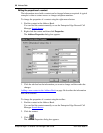
To move a contact using the Menu bar:
1. Click the contact you want to move.
2. Click the Edit menu and then click Cut.
The icon for the contact dims.
3. Open the folder you want to move the contact into.
The contents of the folder appears in the List View box.
4. Click the Edit menu and then click Paste.
The contact is moved to the new folder.
Tip: After you use the Cut command (indicated by the contact icon dimming),
you must use the Paste command to move the contact before using the Cut or
Copy commands again. If you use the Cut or Copy command before pasting
the contact, the contact remains in the original folder and does not move.