


Chapter 18 — Connecting the trunks Page 275 of 332
Option 11C Mini Planning and Installation Guide
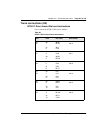
Procedure 41
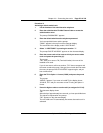
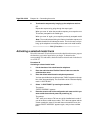
Activating a default model trunk
1 Lift the handset of the administration telephone.
2 Enter the administration Flexible Feature Code to access the
administration menu.
The prompt “PASSWORD?” appears.
3 Enter the default administration telephone password.
You hear special dial tone and the prompt
“TASK?” appears in the top line of the character display.
The second line of the display reads”1 ADD TRUNK”.
4 Select “1 ADD TRUNK” by entering the number “1”.
The prompt “ROUTE ACCESS?” appears on the character display.
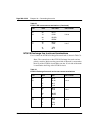
5 Enter the access code of the route to which you want to add a
trunk and press the pound key (#).
The prompt
“TN?” asks you to enter a TN (Terminal Number) from one of the
installed trunk cards.
If you do not enter a valid route number, “TN?” does not appear and
the screen remains the same. If the type of trunk card does not match
the route, the prompt “ROUTE ACCESS?” appears again, and you
hear overflow tone.
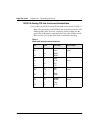
6 Enter the TN in Option 11 format (CCUU) and press the pound
key.
The prompt
“MODEL” appears. If you enter an invalid TN, the display shows
“INVALID, TN?” and you must enter a new TN using the Option 11
format.
7 Press the digits to select a trunk model (as assigned in LD 16).
The character display shows
“OK”.
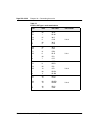
After a delay of approximately four seconds, you hear special dial tone.
The sequence repeats when the prompt
“TN?” appears on the character display.
The next valid trunk TN automatically increments after each trunk is
activated.