


Chapter 6 — Installing the Option 11C Mini Page 93 of 332
Option 11C Mini Planning and Installation Guide
5
If your Option 11C Mini system requires earthquake bracing, refer to
“Chapter 8 — Bracing the Option 11C Mini against earthquakes” on
page 105.
For your system to be braced against earthquakes, you must install the
chassis on a wall in a vertical position.
6
Locate the box containing the Option 11C Mini equipment.
7
Install the Main Chassis. See “Chapter 9 — Installing the chassis” on
page 115. Refer to one of the following procedures, depending on the
position in which you will install the chassis:
— Procedure 2: “Installing the Option 11C Mini chassis on a wall in a
vertical position” on page 118
— Procedure 3: “Installing the Option 11C Mini chassis on a wall in a
horizontal position” on page 123
— Procedure 4: “Installing the Option 11C Mini chassis on a table” on
page 128
— Procedure 5: “Installing the Option 11C Mini chassis in a 19 inch
rack/cabinet” on page 131
8
Install the Chassis Expander. See “Chapter 10 — Connecting the Chassis
Expander to the Main Chassis” on page 135. You can skip this step if
your system only has one chassis.
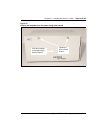
Install the Chassis Expander the same way as the Main Chassis. Refer to
Procedure 6: “Adding a Chassis Expander” on page 135. This procedure
describes how to connect the Main Chassis to the Chassis Expander by
using the two NTDK95 CE-MUX/ DS-30X cables.
9
Install the chassis ground wire for the Main Chassis and Chassis
Expander at this site. See “Chapter 11 – Installing the system ground” on
page 139.