


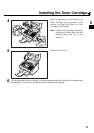
21
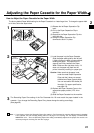
How to Adjust the Paper Cassette for the Paper Width
The factory default Paper Width setting for the Paper Cassette is on Letter/Legal size. To change the paper width
to A4 size, follow the steps below. (see Note 1)
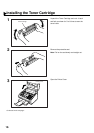
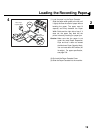
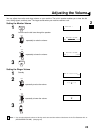
1
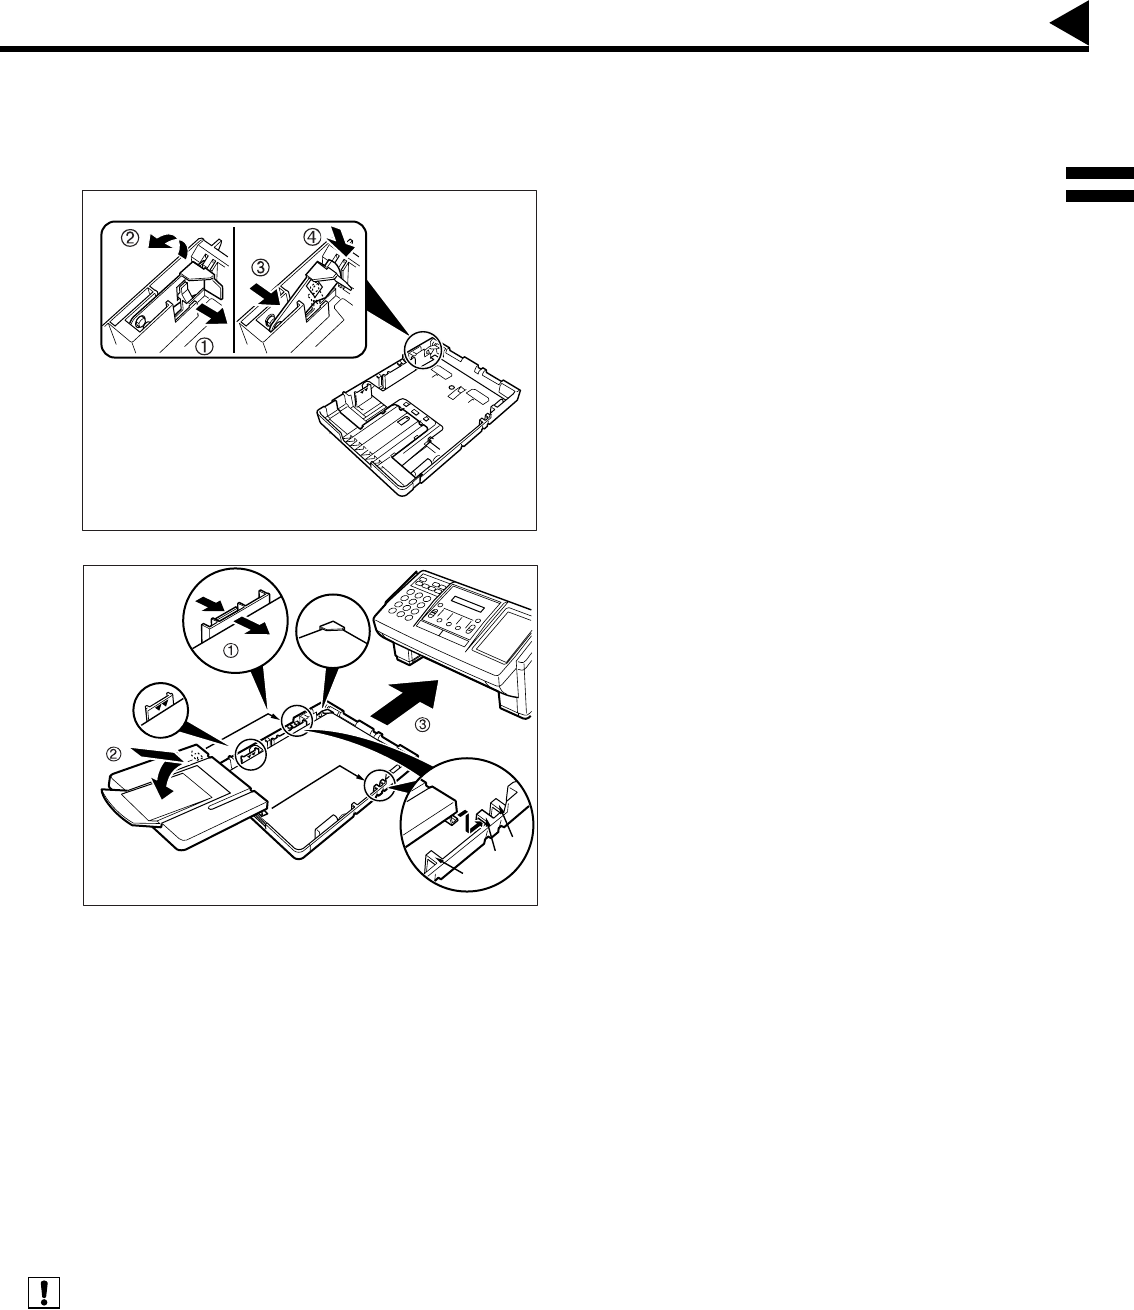
(1) Release the left Paper Separation Clip
latch.
(2) Pull up the Paper Separation Clip to
remove it.
(3) Reposition the Paper Separation Clip into
the A(A4) slot.
(4) Swing the Paper Separation Clip
downward to latch it in place.
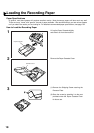
2
(1) Load the paper into the Paper Cassette.
Slide the paper width guide to the left until
it lightly touches the stack of paper without
bending the paper. The paper must fit
squarely and firmly between the Paper
Width Guide and the right side of tray. If it
does not, the paper may feed into the
printer incorrectly resulting in a paper jam.
Caution:
Make sure that the paper is set
under the metal Paper Separation
Clips and that it does not exceed
the Maximum Paper Capacity Mark.
You can load about 250 sheets (20
lb weight). For paper specification,
see page 152.
(2) Replace the Paper Cassette Cover to the
appropriate paper position (LTR, A4 or
LGL).
(3) Slide the Paper Cassette into the machine.
3
The Recording Paper Size setting of the Fax Parameter No. 23 must match the paper loaded in the
cassette. If you change the Recording Paper Size, please change the setting accordingly.
(See page 38)
1. If you forget to change the Recording Paper Size setting in Fax Parameter No. 23 when different paper is installed
in the cassette, the unit will Stop printing after the 1st page of an Incoming Fax and display a "PAPER SIZE
MISMATCH" error. Then, the Recording Paper Size setting automatically adjusts to the proper size and the unit
resumes printing the Incoming Fax from the 1st page.
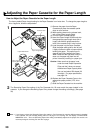
Paper Separation Clip
Max. Paper
Capacity Mark
LGL
A4
LTR
Paper
Width Guide
Adjusting the Paper Cassette for the Paper Width
2
Note: