


ACCULINK 317x E1 DSU/CSU
4-24 December 1996 3170-A2-GB20-20
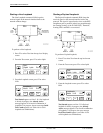
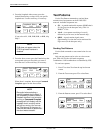
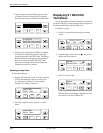
5. The following screens alternately appear on the
LCD until you press a Function key to return to
the Lamp Test screen. In addition, all LEDs blink.
F1 F2
F3
F1
0123456789 : ; < = > ?
@ABCDEFGHIJKLMNO
F2
F3
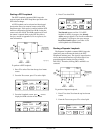
6. When you are satisfied that all LEDs are lighting
and the LCD is functioning properly, abort the
Lamp test from the Lamp T
est screen. The Device
Health and Status screen appears automatically if
there is no activity on the E1 DSU/CSU front
panel for five minutes. However, the Lamp test
remains active until it is aborted.
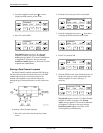
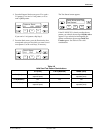
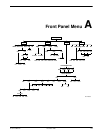
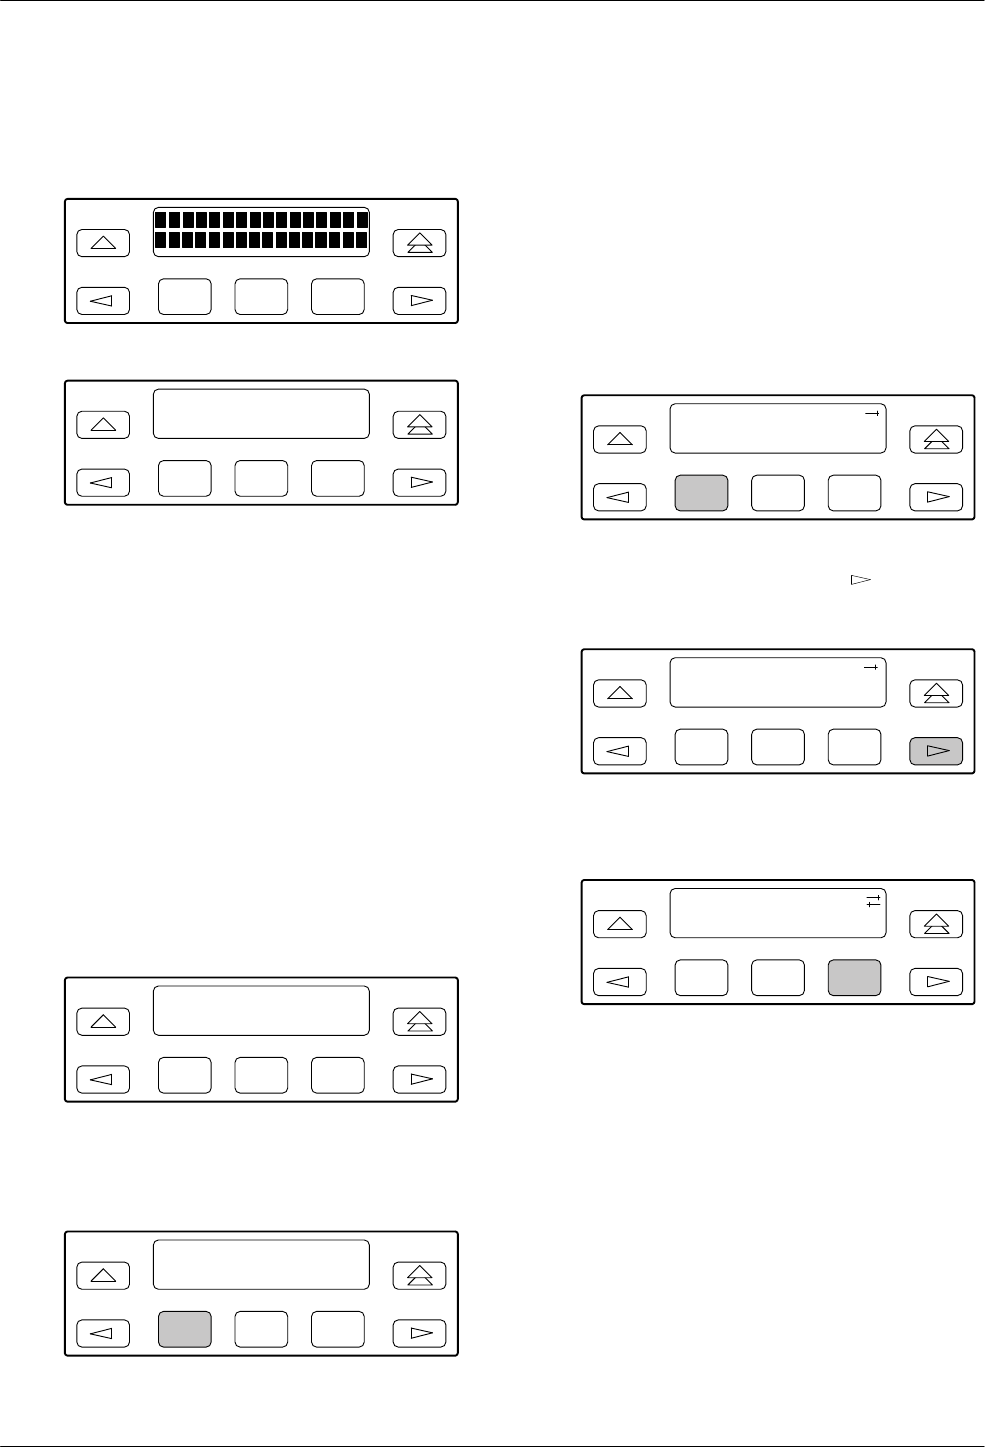
Aborting a Lamp Test
To abort the Lamp test,
1. Display the Lamp T
est screen. T
o do this when the
LCD is alternating the Lamp test screens, press
any Function key. Otherwise, follow Steps 1
through 3 for starting a Lamp test.
F1
Lamp Test:
Abort Start
F2
F3
2. From the Lamp T
est screen, press F1 to select
Abort.
F1
Lamp Test:
Abort Start
F2
F3
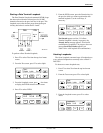
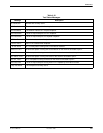
Displaying E1 DSU/CSU
Test Status
Use the T
est Status command to display the active tests
for the E1 DSU/CSU. Status messages that can display on
the front panel LCD are listed in Table 4-10.
T
o display test status,
1. Press F1 to select Stat from the top-level menu
screen.
F1
DS
U E
1 CEPT
Stat Test Cnfig
F2
F3
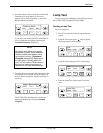
2. From
the Status screen, press the
key once to
display the TStat selection.
F1
Status:
DevHS STest Perf
F2
F3
3. Press F3 to select TStat.
F1
Status:
STest Perf TStat
F2
F3
The T
est Status screen appears showing you what
tests are active for the E1 DSU/CSU.