4 • Running Mail
4-30 SV61436 Rev. D
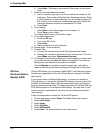
b. Press Enter. (This step is not required if the system is set to auto-
enter.
7. Enter the customer reference number.
a. Scan or manually type your own unique ref
erence number for this
mail piece. This can be a Client Number, Summons Number, Policy
or Claim Number, or Invoice Number. You will not be prompted for
this number if you scanned a combined barcode that includes the
customer reference number and destination ZIP Code.
b. Press Enter.
8. Print postage:
•Press St
art to print the postage on the envelope, or
•Press T
ape to print a tape.
The control center returns to the Main screen.
9. For multiple mail pieces:
a. Press the ZIP ke
y.
b. Type in the ZIP Code.
c. Press Enter.
d. Start processing the next mail piece.
10. Repeat steps 1-9 as necessary.
11. Transfer Files:
a. Connect the control center to the Pitney Bowes Data Center.
b. Upload your records no later than the end of every day. To do this,
pre
ss Menu and select Confirmation Services.
12. The display automatically prompts you to print receipts or reports after
you upload re
cords, provided this feature is enabled in the customer
setting menu (the default for this option is enabled).
Use the Report
s key to select and print receipts and, optionally, a
report of all tracking information processed through the control panel.
Off-Line
Electronic Return
Receipt (ERR)
Off-line ERR allows you to process Certified Mail™ with Electronic Return
Receipt using applications other than Pitnew Bowes’ electronic Certified
Mail solution.
If you already have a Certified Mail solution, or acquire one outside of
Pitney Bowes, you can use the Off-line ERR feature to process your Certi-
fied Mail and Electronic Return Receipt without entering or scanning the
tracking nu
mber into the meter. The appropriate fees for Certified Mail and
ERR will be applied to the mailpiece automatically. You then refer to your
service provider’s application to track the mail and obtain the electronic
return receipt.
Follow the steps below to select the Off-line ERR feature:
1. On the main screen, select Class. The Se
lect Class menu opens.
2. Select 1stCl Letter.
3. Select Letter.
4. Select Certifie
d.
5. Select Offline eRR.
6. Press Enter. T
he system returns to the main screen.


