Setting Up the Printer
12
2
D
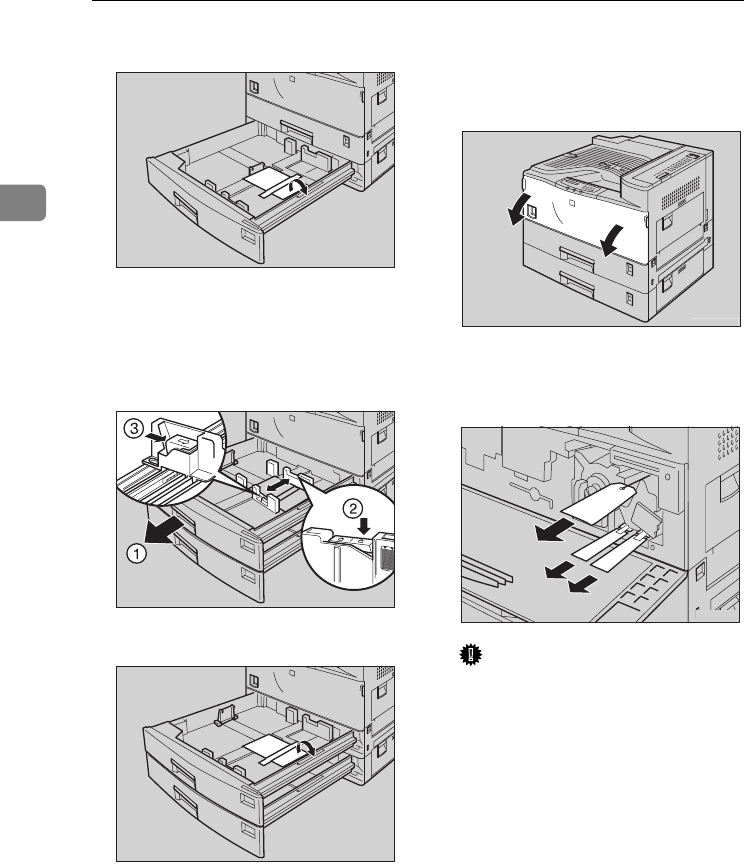
Remove the adhesive tape.
E
Slide tray 1 out (A
AA
A), and release
the side guide adhesive lever (B
BB
B),
and then slide the side guide
while pressing the release lever
(C
CC
C).
F
Remove the adhesive tape.
G
Slide tray 1 and tray 2 into the
printer until they stop.
H
Open the front cover.
I
Pull the three red tags on the pho-
toconductor unit to remove the
metal fitting and two tapes.
Important
❒ Be sure to remove the red tags
from the photoconductor unit.
An error message will appear
on the panel display if you turn
on the printer power before the
red tags are removed.
ZAEH310E
ZAEH320E
ZAEH360E
ZAET010E
ZAEK010E


