Supplies and accessories_ 120
When installing accessories, the battery inside the machine is a
service component. Do not change it by yourself.
There is a risk of an explosion if battery is replaced by an incorrect
type
. Dispose used batteries according to the instructions.
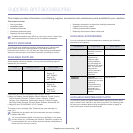
UPGRADING A MEMORY MODULE
Your machine has a dual in-line memory module (DIMM). Use this memory
module slot to install additional memory.
The machine has two memory slots with a factory pre-installed memory
module in one slot. When you are expanding the memory capacity, you can
add a memory module to the vacant memory slot. It is strongly
recommended that you expand a memory module in the vacant memory
slot, and not by removing a pre-installed memory module. If your machine
has 256 MB memory capacity and you want to add 256 MB, the memory
capacity expands up to 512 MB. Order information is provided for additional
memory module. (See "Available accessories" on page 118.)
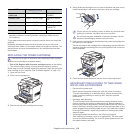
Installing a memory module
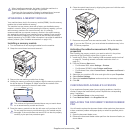
1. Turn the machine off and unplug all cables from the machine.
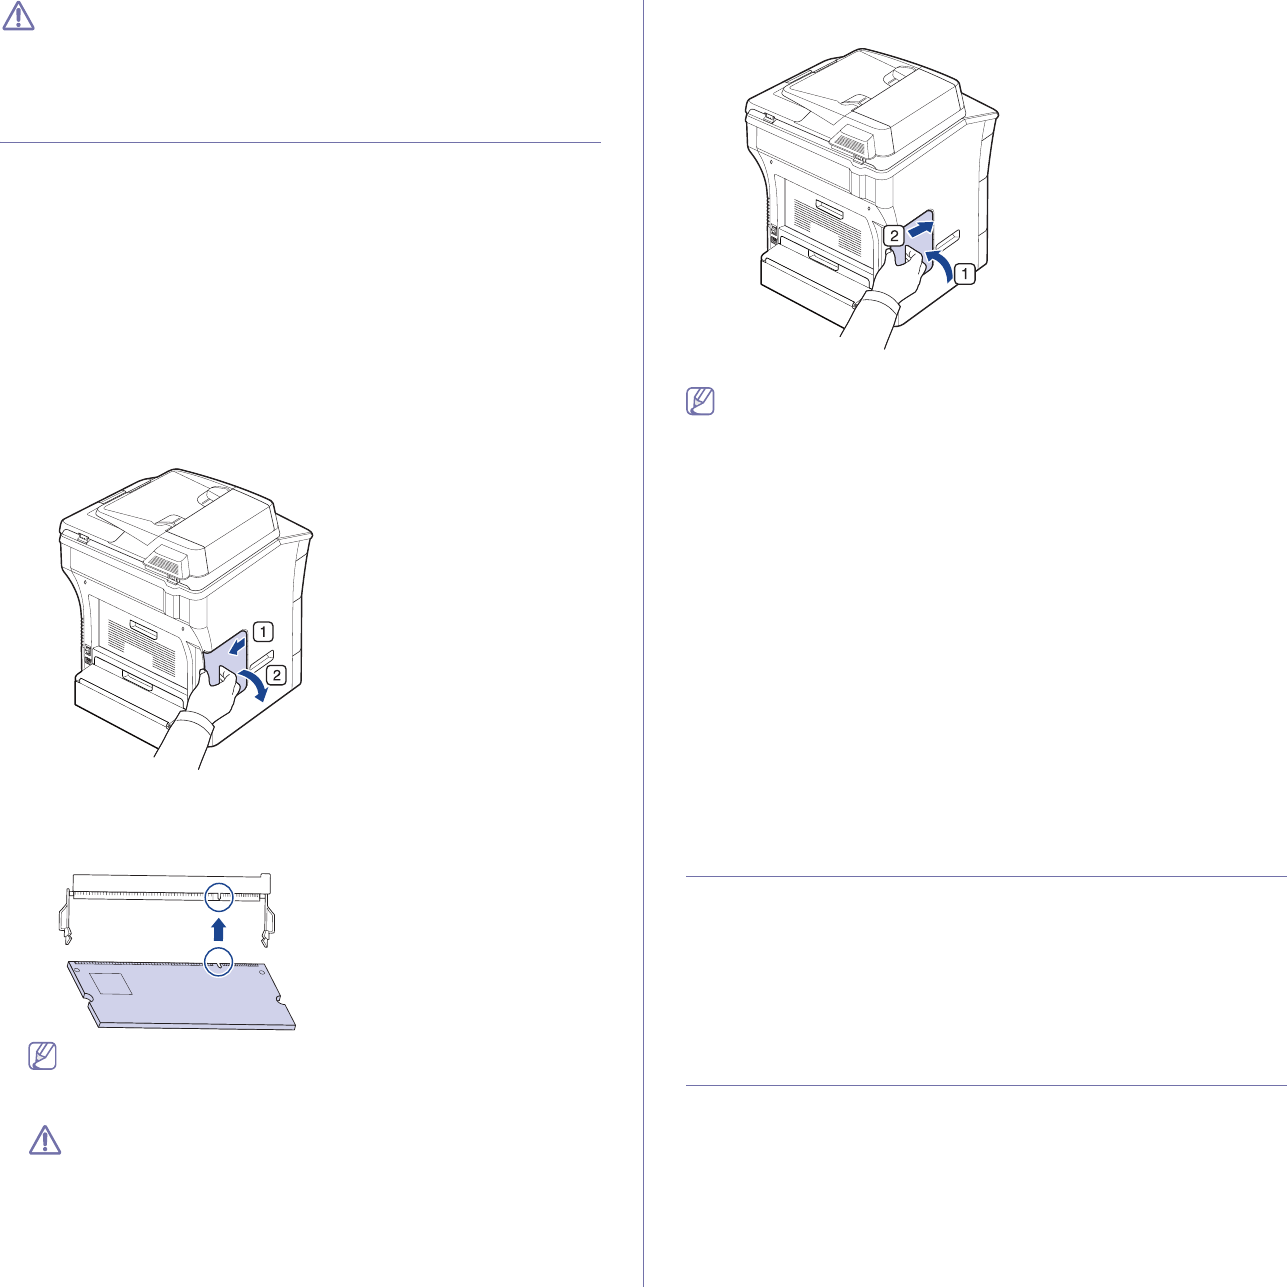
2. Grasp
the control board cover and remove it.
3. Remove the new memory module from its bag.
4. Hold
ing the memory module by the edges, align the memory module on
the slot at about a 30-degree tilt. Make sure that the notches of the
module and the grooves on the slot fit each other.
The notches and grooves illustrated above may not match those
on an actual memory module and its slot.
5. Press the memory module into the slot with care until you hear a 'click'.
Do not press the memory module strongly or the module may be
damaged. If the module does not seem to fit into the slot properly,
carefully try the previous procedure again.
6. C
lose the control board cover by aligning the groove on it with the notch
on the machine and sliding it.
7. Reconnect the power cord and machine cable. Turn on the machine.
If you use the PS driver, you must activate the added memory in the
PS driver properties.
Activating the added accessories in PS printer
properties
After installing the memory module, you need to select it in the printer
properties of the PostScript printer driver in order to use it.
1. Install the PS Driver. (See "Installing USB connected machine’s driver"
on page 26, "Installing network connected machine’s driver" on
page 31.)
2. Click the
Windows Start menu.
• For Wi
ndows 2000, select Settings > Printers.
• For Windows XP/2003, select Printers and Faxes.
• For Windows Vista, select Control Panel > Hardware and Sound >
Printers.
3. Se
lect the your machine’s PS driver and right-click to open Properties.
4. Select D
evice Settings.
5. Select the Ins
tallable Options section and set the necessary options.
6. Click OK.
CHECKING REPLACEABLE’S LIFESPAN
If you experience frequent paper jams or printing problems, check the
number of pages the machine has printed. Replace the corresponding
parts, if necessary.
1. Pres
s Machine Setup on the control panel.
2. Pres
s Machine Status > the Supplies Life tab.
REPLACING THE DOCUMENT FEEDER RUBBER
PAD
You will need to replace the document feeder rubber pad when there seems
to be a consistent problem with paper pickup or when its specified yield is
reached.
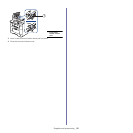
1. Op
en the document feeder cover.
2. R
emove the document feeder rubber pad from the document feeder, as
shown below.


