


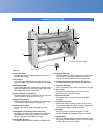
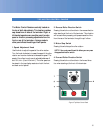

SET-UP AND OPERATION
19
PIVOTING TABLE USE FOR WEBBING
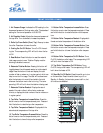
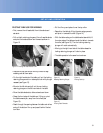
• First, remove the roll easel shaft from its brackets and
set aside.
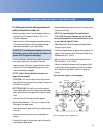
• Pull out both retaining plungers of the roll easel brackets
and pivot the brackets down and forward as shown in
Figure 12.
• Remove the top and bottom wind-up idlers for easy
webbing and set them aside.
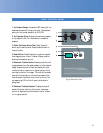
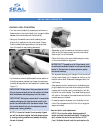
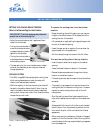
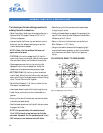
• On the right-hand side of the table, pull out the locking
retaining plunger and turn sideways to lock with plunger
recessed (see Figure 13).
• Move to the left side and pull out the non-locking
retaining plunger on the left-hand side of the table.
• Allow the table brackets to slide outwards and down.
• Grasp the front edge of the table and, lifting up, pivot
the table towards you, away from the rollers (see
Figure 13).
• Reach through the opening between the table and rollers
and pull the bottom film up and pass it behind the bot-
tom idler.
• Pull the film up and place it over the top roller.
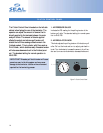
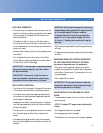
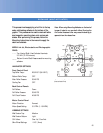
• Reposition the table by lifting the outer edge upwards
and pivot in towards the roller (Figure 14).
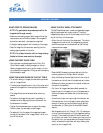
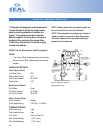
• With the table resting on the table bracket standoffs, lift
the outer edge of the table and push the table in towards
the roller (see Figure 15). The non-locking retaining
plunger will catch automatically.
• Moving to the right-hand side of the table release the
locking retaining plunger so it locks in place.
• The table operation is the same front and rear.
Figure 12. Pivoting Roll Easel Bracket Down
Figure 13.
Releasing Retaining Plunger
Figure 15.
Pivoting Table Forwards
Figure 14
Pivoting Table Up