


– 15 –
SPECIFICATIONS AND OPERATION
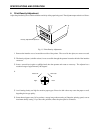
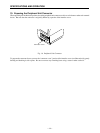
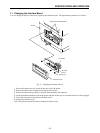
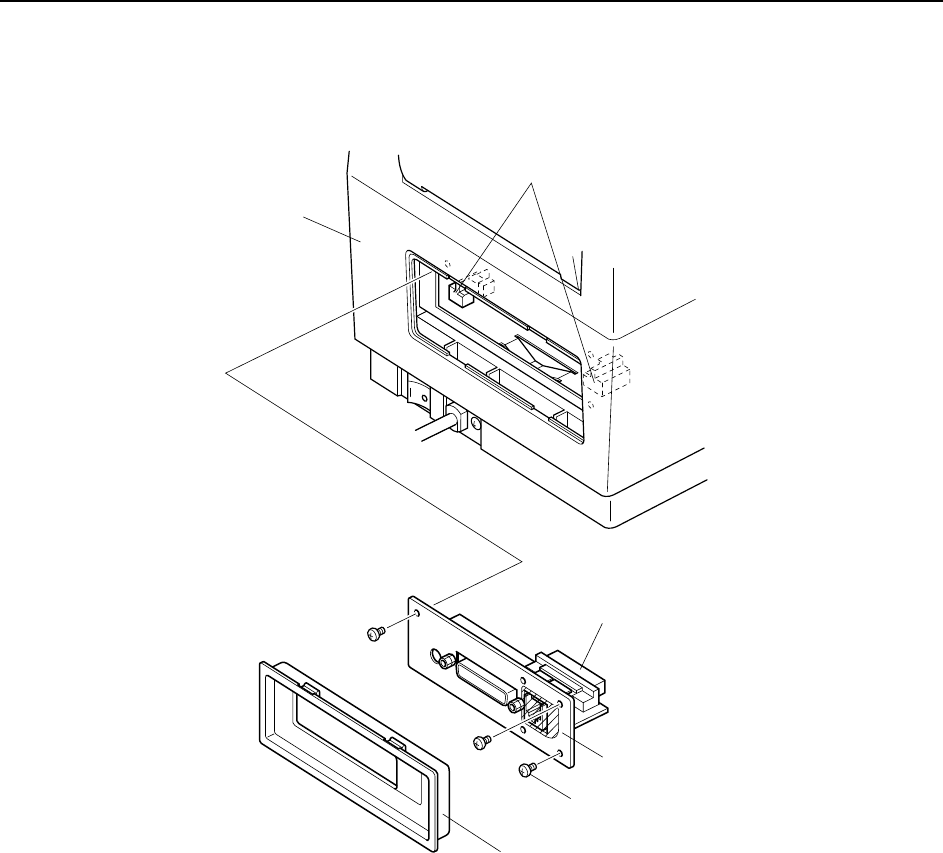
11. Changing the Interface Board
You can change the printer’s interface by replacing the interface board. The replacement procedure is as follows.
Fig. 1-7 Changing the Interface Board
1 Remove the interface cover, located on the rear side of the printer.
2 Remove the three screws holding the interface board in place.
3 Remove out the board by pulling on the pull sheet fastened to the connector.
4 Fit the replacement interface board to the guides and push all the way in so that the connector is fully engaged.
5 Fasten the outer plate to the printer with three screws.
6 Replace the interface cover.
Note: The printer automatically detects changes in interface type.
Interface
board
Screws (3)
Interface cover
Interface board PCB guide
Printer
Connector