10
6
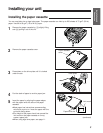
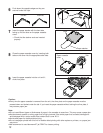
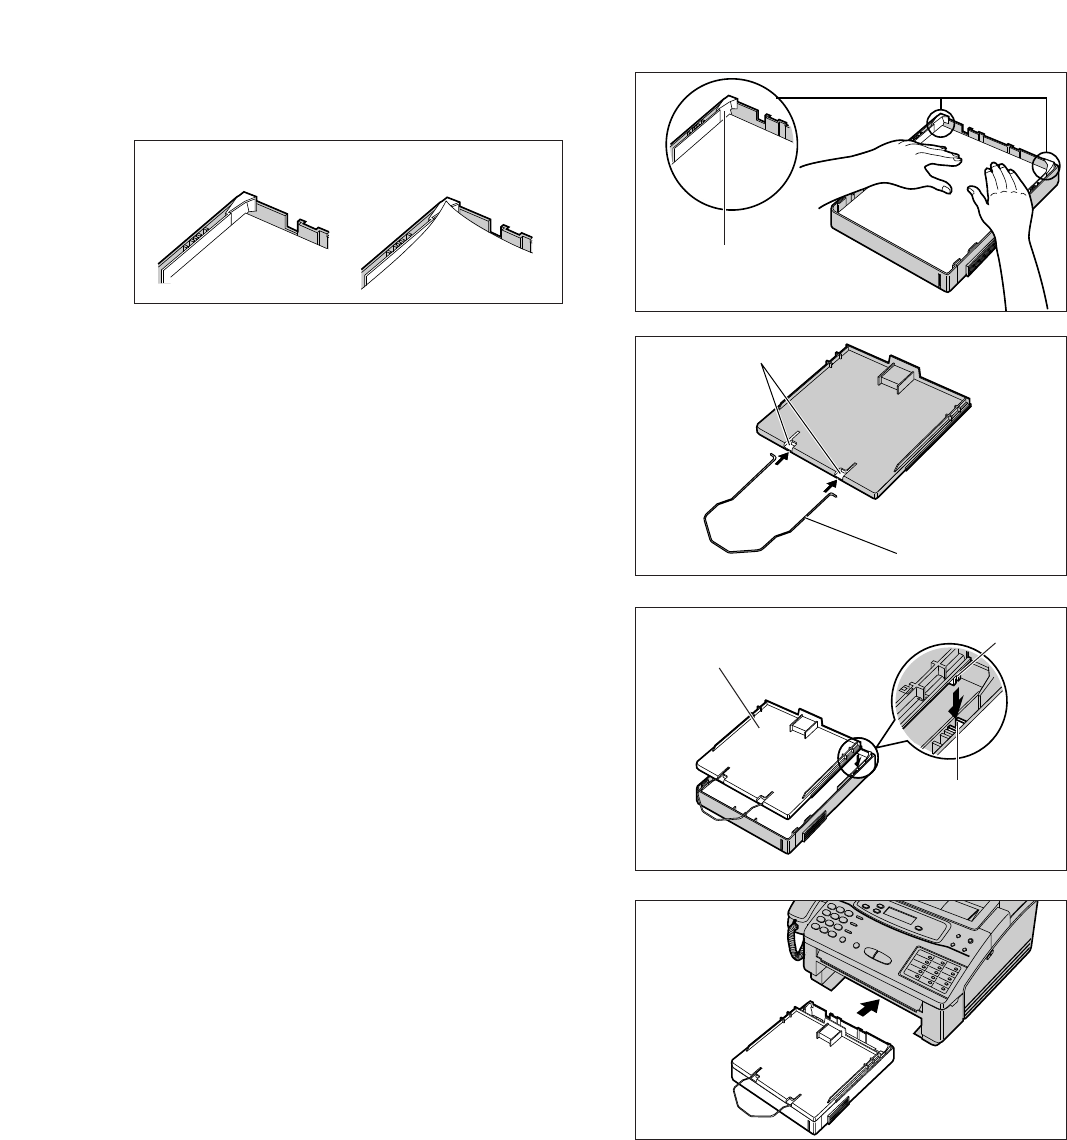
Push down the opposite edges so they are
secured under the clips.
7
Insert the paper stacker with the bent side
facing up into the slots on the paper cassette
cover.
—Check that the stacker ends are inserted
properly.
8
Close the paper cassette cover by inserting both
tabs on the cover into the appropriate side slots.
9
Insert the paper cassette into the unit until it
clicks into place.
Caution:
¡Every time the paper cassette is removed from the unit, the silver plate on the paper cassette must be
pressed down and locked under the tab. If you insert the paper cassette without locking the silver plate, it
may cause a paper jam.
Note:
¡Do not use different types or thicknesses of paper in the cassette at same time. This may cause a paper jam.
¡Avoid extremely smooth or shiny paper that is highly textured. Also avoid paper that is coated, damaged or
wrinkled paper with a cotton and/or fiber content that is over 20 %.
¡Avoid used paper for double-sided printing.
¡Do not use paper printed with this unit for double-sided printing with other copiers or printers, or a paper jam
may occur.
¡We recommend to use Hammermillg jet PRINT for clearer printing.
Correct Incorrect
Clip
Slots
Paper stacker
Paper cassette
cover
Slot
Tab


