


Using Your Printer with a Macintosh
33
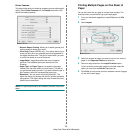
6 Enter the printer’s IP address in the Printer Address field.
7 Enter the queue name in the Queue Name field. If you cannot
determine the queue name for your printer server, try using the
default queue first.
8 For MAC OS 10.3, if Auto Select does not work properly, select
Xerox in Printer Model and your printer name in Model
Name.
• For MAC OS 10.4, if Auto Select does not work properly,
select Xerox in Print Using and your printer name in
Model.
• For MAC OS 10.5, if Auto Select does not work properly,
select Select a driver to use... and your printer name in
Print Using.
Your machine appears on the Printer List and is set as the
default printer.
9 Click Add.
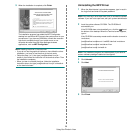
Mac OS 10.3 or higher (Xerox Phaser 3250DN)
1 Follow the instructions on “Installing Software” on page 32 to
install the PPD file on your computer.
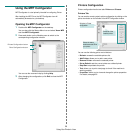
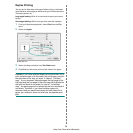
2 Open the Applications folder → Utilities, and Print Setup
Utility.
• For MAC OS 10.5, open System Preferences from the
Applications folder, and click Printer & Fax.
3 Click Add on the Printer List.
• For MAC OS 10.5, press the “+” icon then a display window
will pop up.
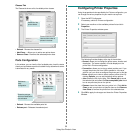
4 For MAC OS 10.3, select the Rendezvous tab.
• For MAC OS 10.4, click Default Browser and find the
Bonjour.
• For MAC OS 10.5, click Default and find the Bonjour.
The name of your machine appears on the list. Select
XRX000xxxxxxxxx from the printer box, where the xxxxxxxxx
varies depending on your machine.
5 For MAC OS 10.3, if Auto Select does not work properly, select
Xerox in Printer Model and your printer name in Model
Name.
• For MAC OS 10.4, if Auto Select does not work properly,
select Xerox in Print Using and your printer name in
Model.
• For MAC OS 10.5, if Auto Select does not work properly,
select Select a driver to use... and your printer name in
Print Using.
Your machine appears on the Printer List and is set as the
default printer.
6 Click Add.
For a USB-connected
Mac OS 10.3 or higher
1 Follow the instructions on “Installing Software” on page 32 to
install the PPD file on your computer.
2 Open the Applications folder → Utilities, and Print Setup
Utility.
• For MAC OS 10.5, open System Preferences from the
Applications folder, and click Printer & Fax.
3 Click Add on the Printer List.
• For MAC OS 10.5, press the “+” icon then a display window
will pop up.
4 For MAC OS 10.3, select the USB tab.
• For MAC OS 10.4, click Default Browser and find the USB
connection.
• For MAC OS 10.5, click Default and find the USB connection.
5 Select your printer name.
6 For MAC OS 10.3, if Auto Select does not work properly, select
Xerox in Printer Model and your printer name in Model
Name.
• For MAC OS 10.4, if Auto Select does not work properly,
select Xerox in Print Using and your printer name in
Model.
• For MAC OS 10.5, if Auto Select does not work properly,
select Select a driver to use... and your printer name in
Print Using.
Your machine appears on the Printer List and is set as the
default printer.
7 Click Add.