


XES Synergix 8825/8830/8850/8855 Digital Solution User Guide 95
Main Menu (continued)
SCANNER DIAGNOSTICS
The SCANNER DIAGNOSTICS option of the DIAGNOSTICS menu provides
a sub-menu of the following choices:
• IMAGE PATH – Enables you to validate the operation of the image
processing (IP) card and the image bar.
• SCAN BAR – Enables you to calibrate the response of the scan bar.
• FULL SYSTEM TEST – Enables you to run all applicable tests on the
Scanner to determine if it is working properly.
• WRITE NVR – Enables the Customer Service Engineer to modify the
contents of the non-volatile memory of the Scanner. The diagnostic
password is required for this function.
• RESET NVR DEFAULTS – Enables the Customer Service Engineer to
reset the NVR values to the factory default values. The diagnostic
password is required for this function.
• SCANNER RELIABILITY METER – Enables you to gather data about
the reliability of the scanning mechanism.
• SCANNER FAULTS (ORDERED) – Enables you to view the entries in
the internal Scanner Fault Log.
• SCANNER FAULTS (COUNTS) – Enables you to view the last cleared
faults.
• CLEAR SCANNER FAULT LOG – Enables the Customer Service
Engineer to erase the contents of the Scanner Fault Log. The diagnostic
password is required for this function.
• COMPONENT TESTS – Provides a sub-menu of Scanner component
diagnostic routines. Some of these routines are accessible by both the
operator and the Customer Service Engineer. Others are accessible by
the Customer Service Engineer only and require the entry of the
diagnostic password.
• READ NVR – Enables you examine the contents of the non-volatile RAM
(NVR).
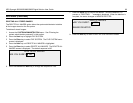
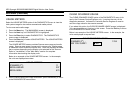
To access the SCANNER DIAGNOSTICS menu:
1. Press the Menu key. The MAIN MENU screen is displayed.
2. Press the Next key until DIAGNOSTICS is highlighted.
3. Press the Enter key to select DIAGNOSTICS. The DIAGNOSTICS
menu screen is displayed.
4. Press the Next key until SCANNER DIAGNOSTICS is highlighted.
5. Press the Enter key to highlight SCANNER DIAGNOSTICS. The
SCANNER DIAGNOSTICS menu screen is displayed. The black arrows
indicate that the menu contains more options than are visible. The
selected option is highlighted.
6. Press the Previous or Next key to scroll through the list of options.
7. When the desired option is highlighted, press the Enter key to select the
option. The menu or screen for the selected option is displayed.
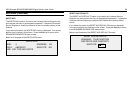
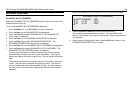
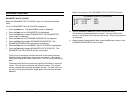
SCANNER DIAGNOSTICS
IMAGE PATH
SCAN BAR
FULL SYSTEM