


XES Synergix 8825/8830/8850/8855 Digital Solution User Guide 20
Getting to know the Synergix Digital Solution (continued)
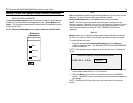
Powering On the Digital Solution
To power on the Digital Solution, you first must switch on the Scan System
and wait for 30 seconds or check that a P is displayed on the status LED in
the back of the Scan System. Then switch on the Controller, then the Printer.
The procedures for powering on the Controller and the Printer vary for the
8825/8830 Digital Solution and the 8855 Digital Solution. Follow the
instructions provided in this section for your system.
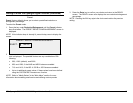
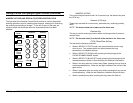
Initial power-on
When the Synergix Scan System is present, the DDS parameter must be set
to Enabled in order to enable the copy/scan functionality. If the DDS
parameter is set to Disabled, copy/scan functionality will not be enabled.
The default for this parameter is Disabled. You must ensure that it is set to
Enabled when powering on the Digital Solution for the first time. After setting
the DDS parameter, wait 30 seconds, then power the system off then on.
Once you enable this parameter, it will remain enabled (even following future
software upgrades).
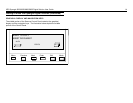
For the Synergix 8825, 8830, and 8850 Digital Solution, you can set this
parameter from either the CONTROLLER CONFIGURATION screen of the
Printer Control Panel or the PRINTER SETUP/Miscellaneous page of the
Web PMT. For the Synergix 8855 Digital Solution, you can only set this
parameter from the Web PMT. Refer to the 8825/8830/8850 Controller
Setup Manual or the Web PMT Printer Manager Tool User Guide for more
information.
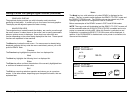
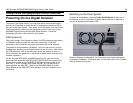
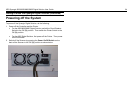
Switching on the Scan System
To switch on the Scanner, press the Power On/Off Switch on the back of
the Scanner to the On (I) position as shown below. Wait for 30 seconds or
until a P is displayed on the status LED.
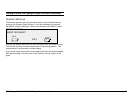
When the Scanner is switched on, the fluorescent lamp inside the Scanner
illuminates immediately. If the lamp does not illuminate, refer to the "Problem
solving" section of this guide.