


XES Synergix 8825/8830/8850/8855 Digital Solution User Guide 78
Main Menu (continued)
Timers
The TIMERS option of the CONFIGURATION menu allows you to set the
values for the time-out functions. Pressing any key or scanning a document
resets the timers.
The timers are as follows:
• FEATURE – Controls how long the current feature parameters remain in
effect after the last key press, scan completion, or insertion of a
document into the Scanner. The FEATURE timer can be set between 0
and 99 minutes. The factory default is 5 minutes. A value of 0 means
that the feature will never time out.
NOTE: To prevent images from being lost, feature time-outs will not occur
during the sets build process.
• PRINTER INTERRUPT – Controls how long the Printer remains in the
interrupted state with no interruption at the Scanner Control Panel. This
timer pertains to print jobs that have been interrupted to allow a copy job
to process. The allowed range is 1 to 99 minutes. The factory default is
1 minute.
• FILE DELETION – Specifies the maximum amount of time a scanned
image file remains on the file system before being deleted. This timer
pertains only to files scanned when the Synergix Digital Solution is in the
READY TO SCAN mode.
This timer can be set between 1 and 24 hours in increments of 1 hour.
When a file is scanned in, it is given a time stamp. When the age of the
file on the hard disk exceeds the value of the FILE DELETION timer, the
file is automatically deleted to allow space for new files. The default
value is 24 hours. After the files have been deleted, the directory will also
be deleted if no other files are scanned to it.
To adjust a timer:
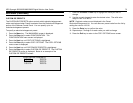
1. Press the Menu key. The MAIN MENU screen is displayed.
2. Press the Enter key to select CONFIGURATION. The
CONFIGURATION menu screen is displayed.
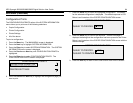
3. Press the Next key until TIMERS is highlighted.
4. Press the Enter key to select TIMERS. The TIMERS screen is
displayed.
5. Press the Previous or Next key to highlight the desired timer.
6. Press the Enter key to select the highlighted timer.
7. Use the numeric keypad to enter the timer value.
8. Press the Enter key to confirm the value.
9. Repeat steps 5 through 8 if you want to set the value for additional
timers.
10. Press the Exit key to return to the CONFIGURATION menu screen.
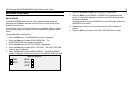
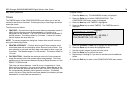
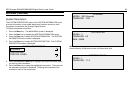
TIMERS
FEATURE (0 − 99 MIN): 5
PRINTER INTERRUPT (1 − 99 MIN): 1
FILE DELETION (1-24 HR): 24