Xerox
®
DocuMate
®
3115
User’s Guide
111
Adding Image Editor Applications to OneTouch
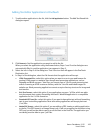
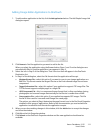
1. To add another application to the list, click the Add application button. The Add Simple Image Link
dialog box opens.
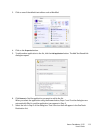
2. Click
Browse to find the application you want to add to the list.
When you select the application using the Browse button, Steps 1 and 2 on the dialog box are
automatically filled in, and the application icon appears in Step 3.
3. Select the icon in Step 3 of the dialog box. That is the icon that will appear in the OneTouch
Destination List.
4. In Step 4 of the dialog box, select the file formats that the application will accept.
•
Windows Bitmap File—select this option if you want to scan to your image application as a
BMP file. This format creates the largest file size as the final scanned image has not been
compressed.
•
Tagged Information File—select this option if your application supports TIF image files. The
TIF file format supports multiple pages in a single file.
•
JPEG Compressed File—this is a compressed image format that is often used when sharing
photographs and scanned images electronically as the file size is smaller than a BMP.
•
Compugraphics File—select this option if your application supports GIF images. This file
format is often used for icons and small images on a web page.
The options you select at Step 4 determine the page format icons in the OneTouch Properties
window for that group of applications. Refer to the documentation you received with the
application to see which text formats the application accepts.
5. When you are done making changes in this window, click the
Add button to accept the changes
and close the window.
6. Click
OK on the Link Properties window.
7. Click
Refresh on the OneTouch Properties window and the new application should now be
available.


