108 Removing and replacing parts Q1860-90918
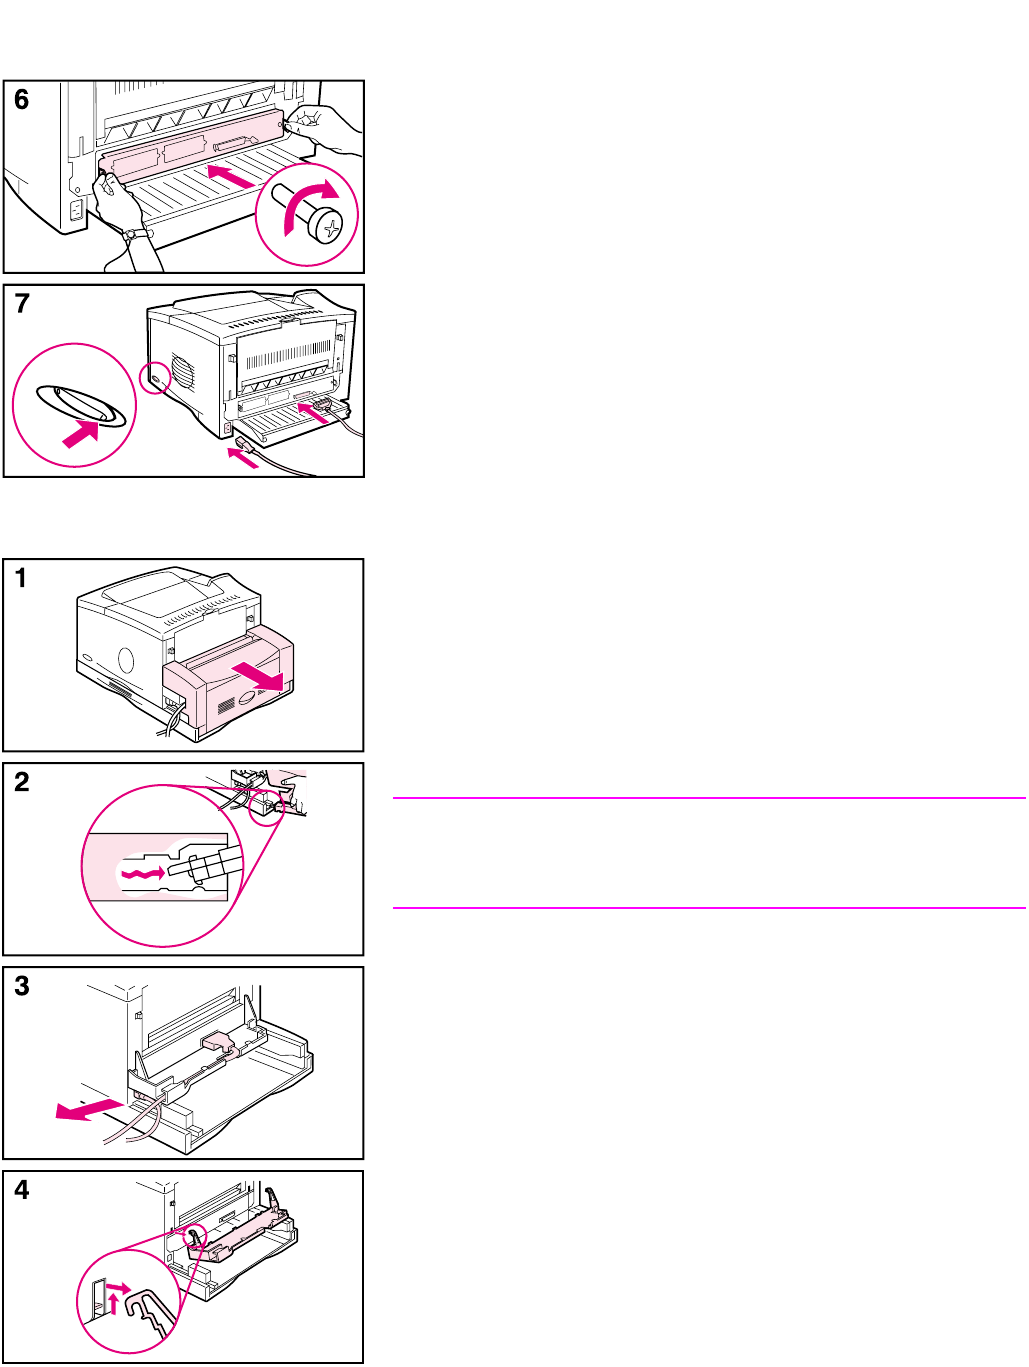
6 Slide the formatter board back into the printer and tighten the two
captive screws.
7 If an optional duplexer is installed, reattach the cable tray and the
rear section of the duplexer. Reattach any interface cables and the
power cord. Turn the printer on and test the DIMM (see page 109).
If an optional duplexer is installed:
1 Slide the rear section of the duplexer away from the printer.
2 Remove the rear section of the duplexer by lifting and rotating the
rear section to clear all of the tabs from the grooves.
3 Unplug the power cord and disconnect any cables.
4 Remove the cable tray by lifting it out of position.
5 Go back to step 2 on page 107.
Note
Reverse these steps to reinstall the cable tray and the rear section of
the duplexer. Make sure that the cable tray is properly installed and the
cables are routed through the left side.
www.GovTechMedia.com


