140 Removing and replacing parts Q1860-90918
Tray 1 roller
1 Open the top cover and remove the toner cartridge.
2 Facing the front of the printer, raise the green center handle of the registration assembly.
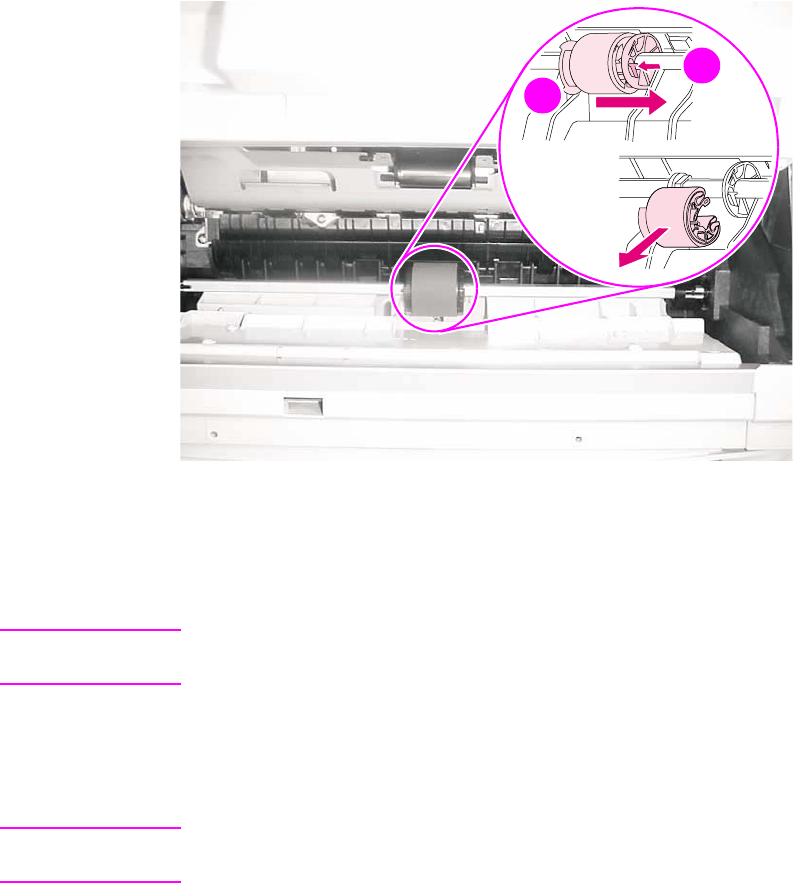
3 Lift the locking tab (callout 1) on the right-side roller cam, and slide the cam to the right.
4 Slide the roller between the two cams, and then remove the roller from the shaft.
Figure 69. Tray 1 roller removal
To reinstall
Note If the Tray 1 separation pad should be replaced, replace the separation pad before you replace
the pickup roller (see “Tray 1 separation pad” on page 141).
1 Orient the roller so that the thumb grip (callout 2) is on the left.
2 Insert the roller onto the shaft, and then slide the roller to the right until it is seated.
3 Slide the roller and cam to the left until they click into place.
Note Make sure that the locking tab is engaged by trying to move the roller to the right. The roller will
not move if the locking tab is engaged.
2
1
2
2
www.GovTechMedia.com


