


5 -22 Agilent Technologies Z5623A Option H48
Performance Verification
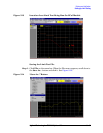
Setting Up Limit Testing
Saving the Limit Test File
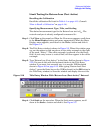
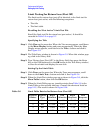
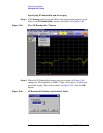
Step 1. Click File on the menu bar. When the File menu appears, scroll down to
the Save As... button and click it. See Figure 5-14.
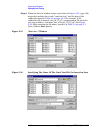
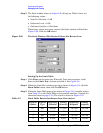
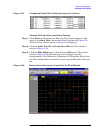
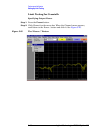
Step 2. When the Save As window comes up as shown in Figure 5-15, type a file
name that includes the words, “return loss,” the words, “port active”,
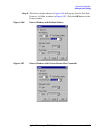
and the date of the calibration listed in Table 4-1 on page 4-13. For
example, if the calibration file is named, “cal_06_17_01”, an appropriate
file name for this step would be, “return_loss_port_active_with_
06_17_01_cal”. See Figure 5-16. After entering the file name, record it
in Table 5-3 on page 5-7. Next, click the Save button.
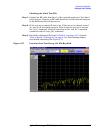
Checking the Limit Test File
Step 1. Connect an RF cable from Port 1 of the network analyzer to Test Port 1
of the test set. Connect an RF cable from Port 2 of the network analyzer
to the Reflection Port of the test set.
Step 2. If the test set is turned off, turn it on. If the test set is already turned
on, turn it off, then back on again. This causes the test set to execute
the “*rst;” command, which is equivalent to the “refl_01;” command
combined with the “tran_08;” command.
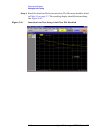
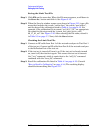
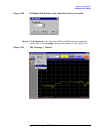
Step 3. Recall the calibration file listed in Table 4-1 on page 4-13. (Consult
“How to Recall a Calibration” on page 4-14.) The resulting display
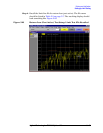
should look something like Figure 5-17.