


Chapter 7: Configuring the Embedded Authentication Server (EAS)
210
Configuring the EAS
Once you decide which access point will be configured to use its EAS, you
need to enable the EAS on that access point and configure its database.
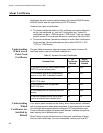
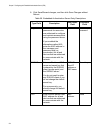
To configure the EAS
1. Install any certificates. For help, see “Installing and Uninstalling
Certificates” on page 208.
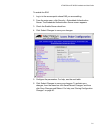
2. On the access point that will contain the EAS, enable the EAS. For
help, see “Enabling the EAS” in the next section.
3. Configure the EAS database. For help, see “Configuring the
Database” on page 212.
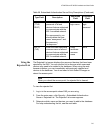
4. Make sure that all access points that are using this EAS (as a
password server, ACL, authentication server, etc.) are configured with
this access point’s IP address in the appropriate RADIUS server IP
Address field. For help, see:
“Configuring the Access Point to Use a Password Server” on
page 177.
“Using an Access Control List (ACL)” on page 184.
“Configuring the Access Point as an Authenticator” on page 193.
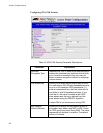
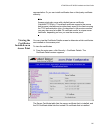
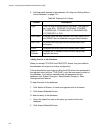
Enabling the EAS In both AT-WA7500 and AT-WA7501 access points, the default secret key
is the same. By having the same default secret key, you can verify that all
access points can communicate with the EAS. Then, for more security,
you should change the secret key to prevent unauthorized access points
from communicating with your network.
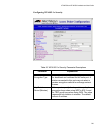
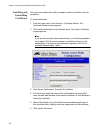
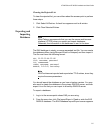
If you want to use the same secret key for communications between the
EAS and all access points, in the Embedded Authentication Server
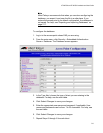
screen, enter the default secret key. For each access point, in the RADIUS
Server List screen, enter the EAS IP address, enter the default secret key
and check the 802.1x check box.
If you want to use a different secret key for communications between the
EAS and each access point, you need to add each access point to the
EAS database as a RADIUS client. For each access point, in the RADIUS
Server List, enter the EAS IP address, enter the secret key and check the
802.1x check box.