


Chapter 5: Configuring the Switch for Stand-alone Operations
78
Configuring the Switch for Stand-alone Operations
Disabling
VCStack
After the switch has initialized its management software, examine the
switch ID LED on the front panel and do one of the following:
If the LED is displaying “0,” the installation procedure is complete.
The switch is now ready for network operations as a stand-alone
unit. Refer to the Software Reference: AlliedWare Plus Operating
System for x510 Series for instructions on how to configure the
operating parameters.
If the LED is displaying a number other than “0,” perform the
following procedures to disable the VCStack feature.
Caution
You have to reset the switch as part of the procedure to disabling
the VCStack feature. Some network traffic may be lost if the device
is already connected to a live network.
Note
The initial management session of the switch must be from the
Console port.
To disable the VCStack feature to use the switch as a stand-alone unit,
perform the following procedure:
Caution
Disabling the VCStack feature requires resetting the switch. If the
switch is already connected to a live network, some network traffic
may be lost.
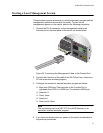
1. Unless you have already done so, start a local management session
as described in “Starting a Local Management Session” on page 73.
2. When prompted, enter a user name and password to log on the
switch. If this is the initial management session of the switch, enter
“manager” as the user name and “friend” as the password. The user
name and password are case sensitive.
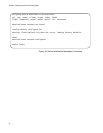
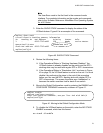
The local management session starts when the User Exec mode
prompt, shown in Figure 39. is displayed.
Figure 39. User Exec Mode Prompt
awplus>