


Configuration - Schedule Page
60
UDM-0404 Endeleo Multi-Format Distribution Hub
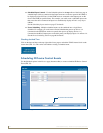
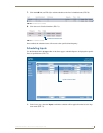
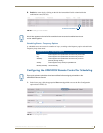
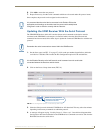
8. Click the event’s Enabled checkbox (FIG. 79).
Once enabled, the scheduled event will execute at the specified time/frequency.
Each new scheduled event is displayed on the Schedule page.
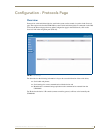
Preset Scheduling
It is possible to create a scheduled Preset (or Combination) event - events based on schedules already
created (such as combining two or more existing events), via options in the Schedule page.
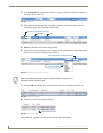
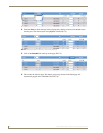
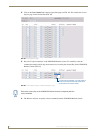
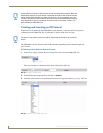
1. In the Schedule page (which displays a listing of all currently scheduled events), click each
schedule’s Preset link (FIG. 80).
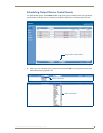
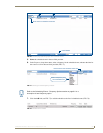
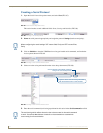
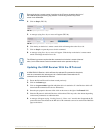
2. The individual scheduled event numbers appear in the Preset toolbar at the bottom of the page
(FIG. 81).
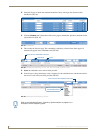
3. Specify a frequency for the Preset event by selecting from the Frequency drop-down menu
(FIG. 81).
4. Enter a Time for the Preset event by typing directly into the text fields provided (FIG. 81).
5. If an interval is required between each individual schedule within the Preset schedule, specify a time
interval (in minutes) in the Interval field (FIG. 81).
6. Assign the Preset schedule a unique name by replacing the default text (FIG. 81).
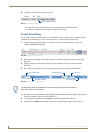
7. Finally click the Add hyperlink button. The Preset event should now appear in the event list.
FIG. 79 An enabled schedule
FIG. 80 Schedule page - Preset links
FIG. 81 Schedule page - Preset toolbar
Enabled Scheduled Event
Schedule numbers
Select frequency
Enter time
Add Preset event
Enter Preset name
The Frequency and Time specified here overrides any previously created frequency /
times used in the Preset schedule.