ASUS NCLV-D2 SeriesASUS NCLV-D2 Series
ASUS NCLV-D2 SeriesASUS NCLV-D2 Series
ASUS NCLV-D2 Series
5-115-11
5-115-11
5-11
5.2.25.2.2
5.2.25.2.2
5.2.2
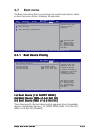
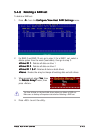
Adding or viewing a RAID configurationAdding or viewing a RAID configuration
Adding or viewing a RAID configurationAdding or viewing a RAID configuration
Adding or viewing a RAID configuration
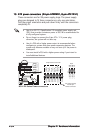
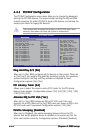
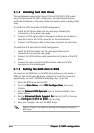
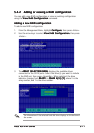
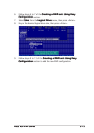
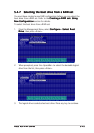
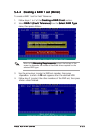
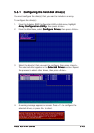
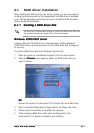
You can add a new RAID configuration or view an existing configuration
using the
View/Add Configuration View/Add Configuration
View/Add Configuration View/Add Configuration
View/Add Configuration command.
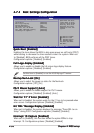
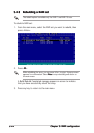
Adding a new RAID configurationAdding a new RAID configuration
Adding a new RAID configurationAdding a new RAID configuration
Adding a new RAID configuration
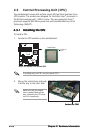
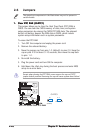
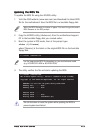
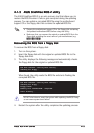
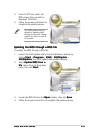
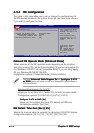
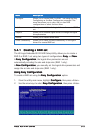
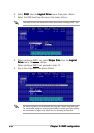
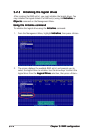
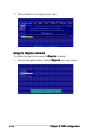
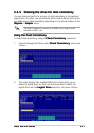
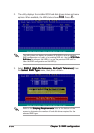
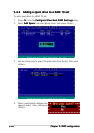
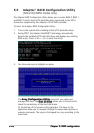
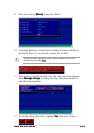
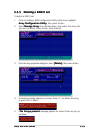
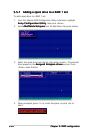
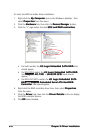
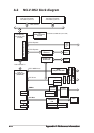
To add a new RAID configuration:
1. From the Management Menu, highlight
ConfigureConfigure
ConfigureConfigure
Configure, then press <Enter>.
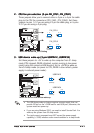
2. Use the arrow keys to select
View/Add ConfigurationView/Add Configuration
View/Add ConfigurationView/Add Configuration
View/Add Configuration, then press
<Enter>.
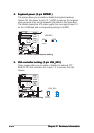
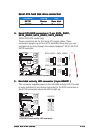
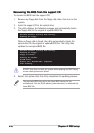
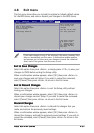
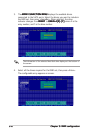
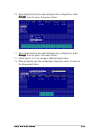
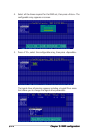
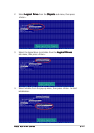
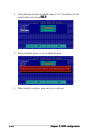
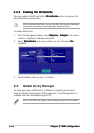
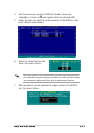
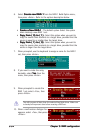
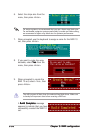
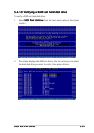
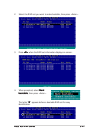
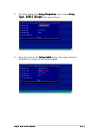
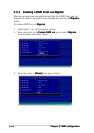
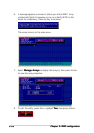
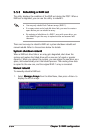
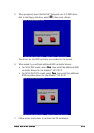
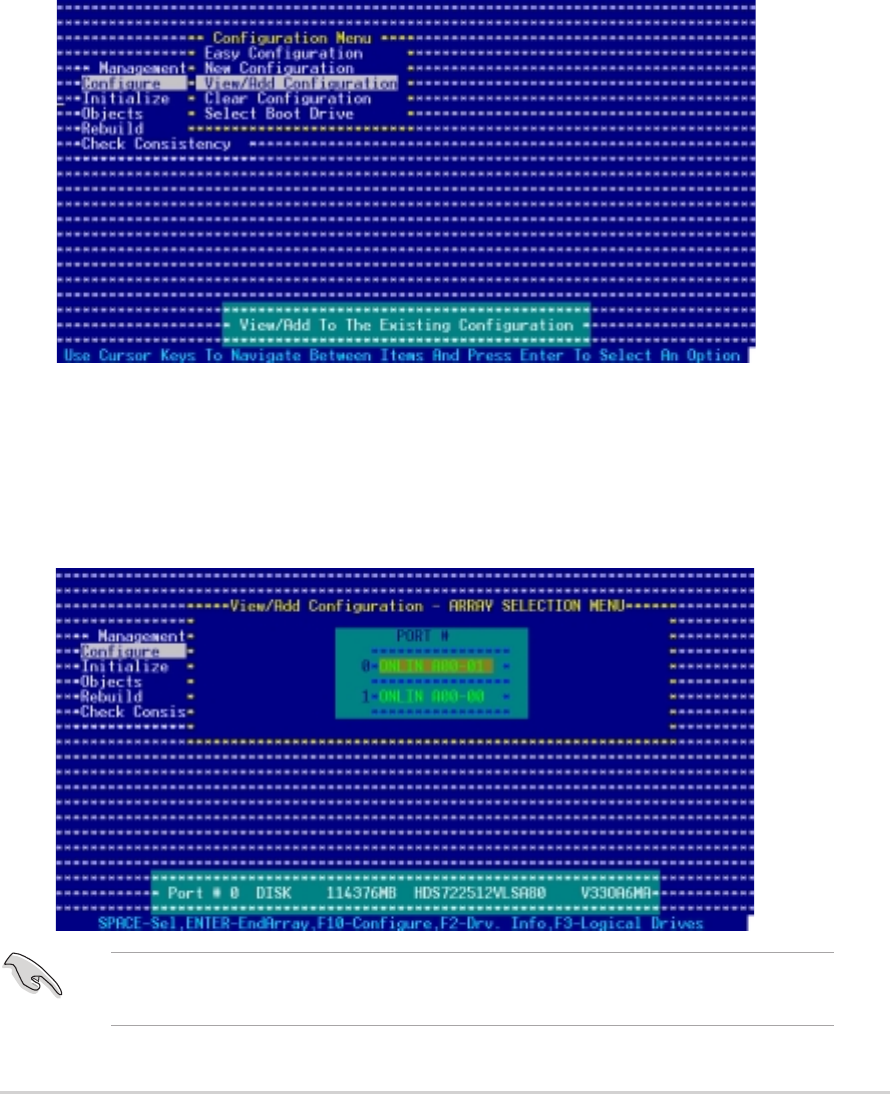
3. The
ARRAY SELECTION MENU ARRAY SELECTION MENU
ARRAY SELECTION MENU ARRAY SELECTION MENU
ARRAY SELECTION MENU displays the available drives
connected to the SATA ports. Select the drive(s) you want to include
in the RAID set, then press <SpaceBar>. When selected, the drive
indicator changes from
READYREADY
READYREADY
READY to
ONLIN A[X]-[Y]ONLIN A[X]-[Y]
ONLIN A[X]-[Y]ONLIN A[X]-[Y]
ONLIN A[X]-[Y], where X is the
array number, and Y is the drive number.
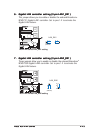
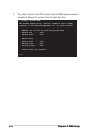
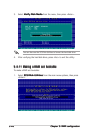
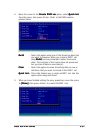
The information of the selected hard disk drive displays at the bottom of
the screen.