


4. ClickShare installation
4. CLICKSHARE INSTALLATION
About this chapter
The installation chapter gives an overview of the different ways to install the bas e unit of ClickShare, the poss ible connec tions and
the use of ClickShare Link for an iPad co nnection.
Overview
• Installatio n methods for the Base unit
• Table mounting
• Wa ll mounting
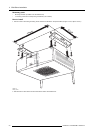
• Ceiling mounting
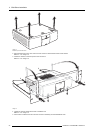
• Rack mounting
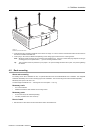
• Recommendations about antenna placement and orientation
• Video signal connections to the Base Unit
• Audio connection
• LAN connection
• Power connection and switching on
• Connecting an iOS device
WARNING: D o not connect to the mains power during installation.
WARNING: Make su re the mains pow er con nection to the Base Unit is accessible to the user at all times.
CAUTION: Mounting the Base Unit under a random angle is not allowed. It should be mounted horizontal or
vertical acco rding to the installation instructions.
WARNING: Only use the antennas that are d elivered with the product. Other an tennas a re n ot allowed.
WARNING: Use a power cord which complies to local regulations. If not included in the box, contact your
local dealer for a correct power cord.
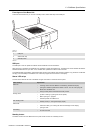
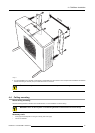
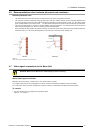
4.1 Installation methods for the Base unit
For optimal performance, install t he Base U nit close to the display and avo id obstacles between the Base Unit
and t he Buttons. Do not block the fan inlets an d outlets o f the Base Unit!
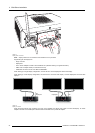
Introduction to the installation methods
The base unit can be installed in different w ays in a meeting room:
• Table mounted
• Wa ll mounted
• Ceiling mounted
• Rack mounted
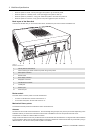
The antennas are removable. They can be fixed to the Base U nit depending on the way the Bas e Unit is installed in the room. T he
antennas can rotate for better w ireless connection.
R5900004 CLICKSHARE 19/08/2014
17