


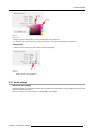

6. Web Interface
4. Click Apply to confirm the changes.
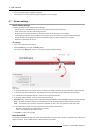
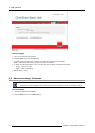
Fixed IP address setup
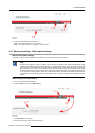
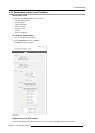
1. Log in to the ClickShare web interface.
2. Click the Setup tab (1) and click Advanced (2).
Image 6-23
Fixed IP address
The Advanced tab is displayed.
3. Check the radio button next to Fixed address (3).
The IP addres s, subnet and gateway input opens .
4. Click in the input field of the IP address and fill out the 4 fi elds.
Note: An address contains 4 octets w ith a max imum value of 255.
This must NOT be 0.0.0.0 for static IP-Address assignment
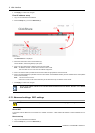
5. Click in the Subnet mask input fields and fill out the 4 fields as appropriate for the loca l subnet.
6. Click in the Default Gateway input fields and fill out the
4 fields. Set the Default-Gateway to the IP-Address of the rou ter (MUST
be on the local subnet!).
Note: This must NOT be 0.0.0.0.
If there is no router on the local subnet then just set this field to an y IP- Address on the subnet.
7. Click Apply to confirm the changes.
Do not use IP address 192.168.2.x for a Subnet mask 255.
255.255.0 and IP address 192.168.x.x for a Subnet
mask 255.255.0.0
6.13 Advanced settings: WiFi settings
WARNING: It is not allowed to operate the Base Unit outside its intended geographical region.
About WiFi
A connection with the Base Unit can be made via a wireless connection. A fixed wireless IP address is used to esta blish the con-
nection.
How to set up
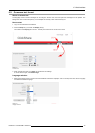
1. Log in to the ClickShare web interface.
2. Click the Setup tab (1) and click Advanced (2).
54
R5900004 CLICKSHARE 19/08/2014