


Confidential
4-1
CHAPTER 4 ADJUSTMENTS AND UPDATING OF SETTINGS,
REQUIRED AFTER PARTS REPLACEMENT
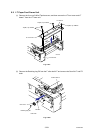
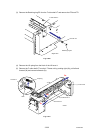
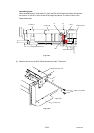
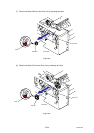
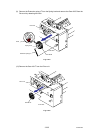
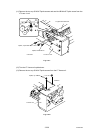
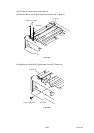
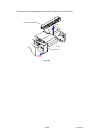
1. IF YOU REPLACE THE MAIN PCB
< What to do when replacing the main PCB >
Rewriting the Firmware (Main Firmware, Sub Firmware (PCL/PS))
EEPROM Parameter Initialization of the Main PCB (Maintenance Mode: Code 01)
Operational Check of Control Panel Button (Maintenance Mode: Code 13)
Operational Check of Sensors (Maintenance Mode: Code 32)
Acquisition of White Level Data and Set the CCD Scanner Area (Maintenance Mode:
Code 55)
EEPROM Customizing of the Main PCB (Maintenance Mode: Code 74)
Setting the Serial Number
Performing the Auto Registration
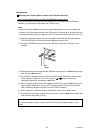
< Which parts to use >
Main PCB: The table below shows the ROM type.
ROM 0 (16 Mbyte)
Main Firmware
(Controller Program, Network Program)
Main PCB
(For a spare parts)
ROM 1 (8 Mbyte)
Sub Firmware (PCL/PS)
(Emulation, Font data)
< What you need to prepare >
(1) Computer (Windows
XP/2000)
Create a folder on the C drive, for example:- (AC FIRMWARE)
(2) A USB flash memory drive
(3) The Firmware
Main Firmware:
LZ1092_A.djf
Sub Firmware (PCL/PS):
LZ0828_A.djf
LZXXXX_$.djf
LZXXXX: First six digits are a parts number of the
firmware.
$: Alphabet representing the revision of the firmware.
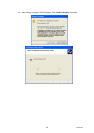
(4) The Maintenance Tool (Mainte.EXE)
Copy it into the folder that has been created on the C drive. Extract the copied file and
run “brmainte.exe” file by double-clicking it.
(5) A USB cable
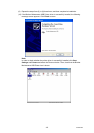
(6) The Download Utility (FILEDG32.EXE)
Copy it into the folder that has been created in the C drive.
(7) The Brother Maintenance USB Printer Driver
Copy it into the folder that has been created on the C drive and extract the copied file.