


Confidential
4-7
< How to rewrite the firmware (Main Firmware and Sub Firmware (PCL/PS))>
After the installation procedure of the Brother Maintenance USB Printer driver is
completed, refer to the following steps for the detailed procedures to rewrite the program
files. If the Brother Maintenance USB Printer Driver has already been installed to your PC
according to this procedure, start to rewrite the program files.
Note:
- DO NOT unplug the power cord of the machine or your PC or disconnect the USB cable
while rewriting the program files.
- If you are using the “FILEDG32.EXE”, the following firmware files are needed to rewrite
the firmware.
Main Firmware:
LZ1092_A.djf
Sub Firmware (PCL/PS):
LZ0828_A.djf
LZXXXX_$.djf
LZXXXX: First six digits are a parts number of the firmware.
$: Alphabet representing the revision of the
firmware.
Rewriting the Sub Firmware (PCL/PS)
(1) Press the Menu and Black Start buttons. Next press the
button four times to make
the machine enter the maintenance mode. (Refer to “1.1 How to Enter the
Maintenance Mode” in Chapter 5.)
TIP:
FAX models equipped with numerical keypads can enter the maintenance mode in the
same way as conventional models; that is, by pressing the Menu, *, 2, 8, 6 and 4
buttons in this sequence.
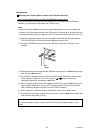
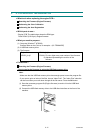
(2) Connect the computer to the machine with the USB cable.
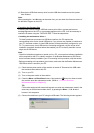
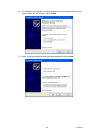
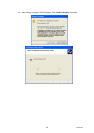
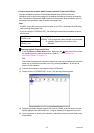
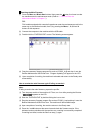
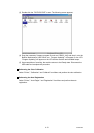
(3) Double-click the “FILEDG32.EXE” to start. The following screen appears.
(4) Drag the necessary firmware program file such as LZ0828_A.djf and drop it onto the
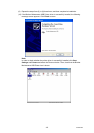
Brother Maintenance USB Printer icon. “Program Updating” will appear on the LCD.
(5) Upon completion of rewriting, the machine is rebooted and returns to the Ready state
automatically.