


2-6 SmartCell ZX-250 User Guide
Installing the Switch Switch Installation and Setup
%"¤›apm The SmartCell ZX-250 switch must be attached to a grounded 3-prong outlet.
Ensure that the outlet has a proper safety ground. Do not defeat the safety
ground by using a 2-prong adapter or extension cord. Doing so voids the new
product warranty.
2p›F For information on power consumption, see Appendix B, “Specifications.”
This desktop installation is complete. Proceed to the “Switch Configuration” section.
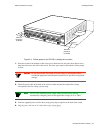
2.4.2 Rack Installation for ZX-250
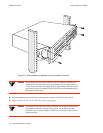
You can install the SmartCell ZX-250 in a standard 19-inch mounting rack by using the provided side-mount brackets.
Each switch occupies 4.5 inches of rack space or between two and three “rack mounting units.” This installation results
in an air gap of approximately 0.5 inches vertically between switches. There must be an air gap of at least four (4)
inches on either side of the rack for proper air flow to the cooling fans. (the ZX-250 chassis are 17.5 inches wide by
14.5 inches deep.)
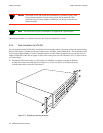
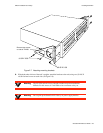
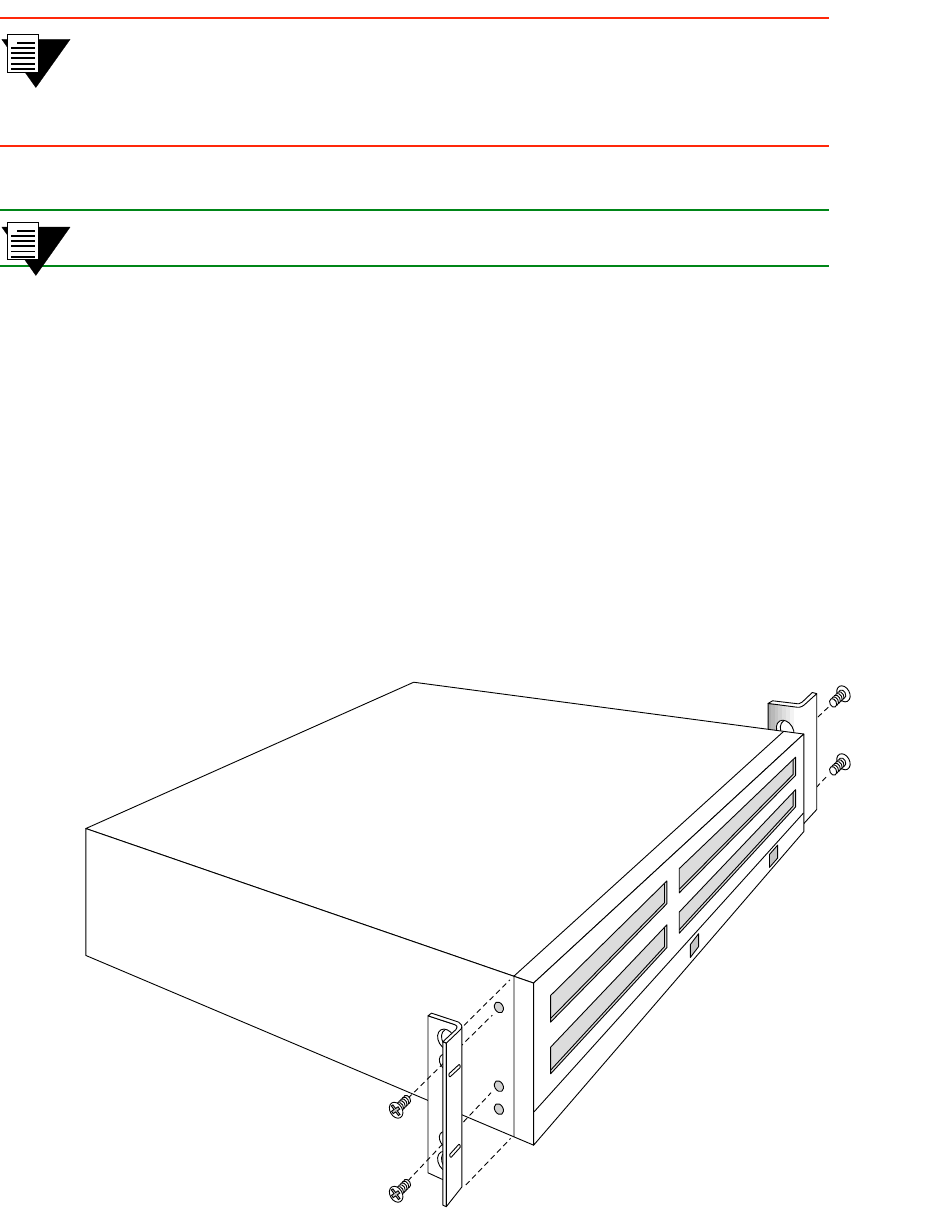
s• With the ZX-250 switch resting on a flat surface, use a Phillips screwdriver to mount the brackets
on both sides of the front of the switch (see Figure 2-5). Use two (2) #8-32 x 0.38 flat-head screws
to attach each bracket to the side of the chassis.
Figure 2-5 Attaching mounting brackets.