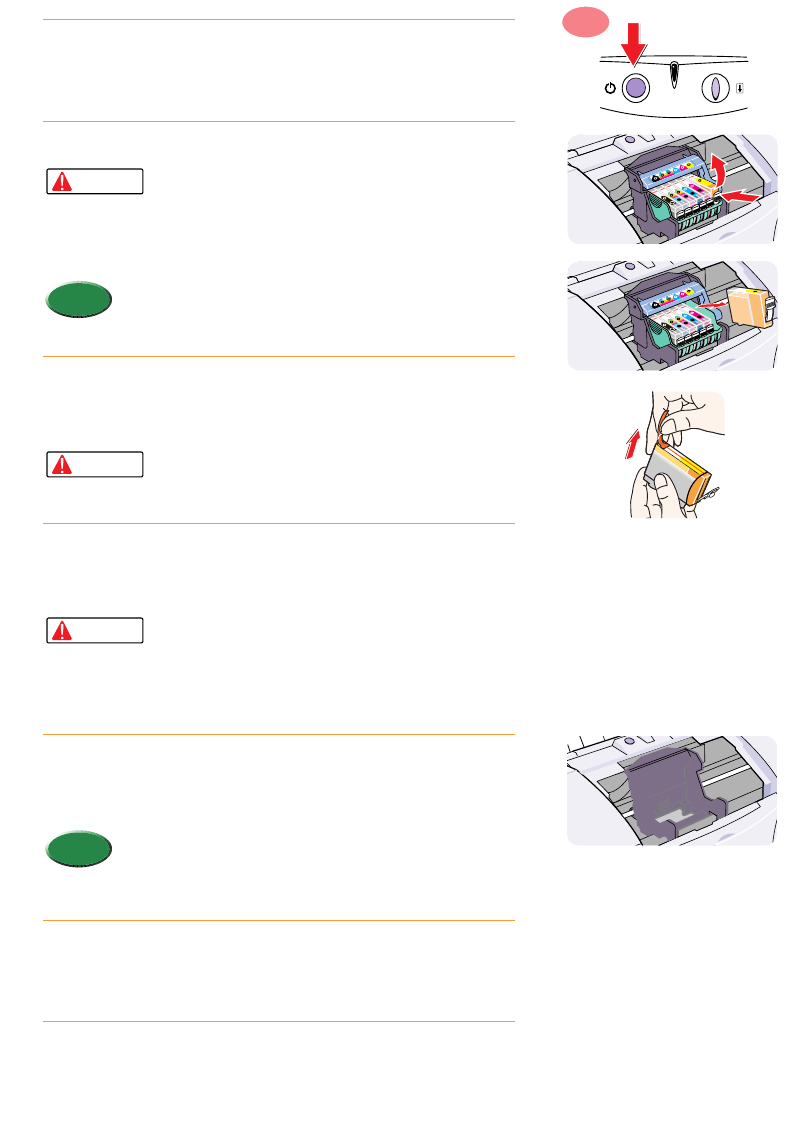
When an ink tank runs out of ink, follow this procedure to replace the ink tank.
Make sure the printer is switched on then open the front
cover.
•The BJ Print Head holder moves to the centre automatically.
Remove the empty ink tank.
•If you need to replace more than one empty ink
tank, remove and replace each tank one by one to
prevent installing an ink tank in the incorrect slot.
•To prevent interfering with the flow of ink from a
tank, never touch the ink port of an ink tank.
•Do not remove the BJ Print Head.
•Discard empty ink tanks according to the local laws
and regulations regarding disposal of consumables.
Remove the new ink tank from its package. Pull the
orange tape up and against the perforations to open the
packing film.
•Remove the film carefully so you do not remove
the label from the ink tank. If the label is removed,
the ink tank cannot be used.
Grip the bottom of the ink tank as shown in the
illustration and twist off the orange protective cap in the
direction of the arrow.
•To avoid spilling ink, never press in on the sides of
an ink tank.
•Discard the protective cap and never attempt to
reattach it to an ink tank according to the
environmental laws of your country.
Hold the new ink tank at a slight angle, align it with the
correct slot, and then insert it. Make sure you insert the
ink in the correct slot.
•Check the color of the ink tank with the label on the
printer that shows you the correct slot for each ink tank
to ensure that the ink tank is inserted into the correct
slot.
To lock the ink tank in place, press down on the top of
the ink tank. Press down until you hear the tank lock in
place.
Close the front cover.
•The print head holder returns to the home position and print head
cleaning starts automatically. The POWER/ERROR lamp flashes
during print head cleaning. When print head cleaning is finished
and the POWER/ERROR lamp remains on, you can resume normal
operation.
7.
6.
Memo
5.
Caution
4.
Caution
3.
Memo
Caution
2.
1.
ON


