COPYRIGHT
©
2001 CANON INC. 2000 2000 2000 2000 CANON iR2200/iR2800/iR3300 REV.0 MAR. 2001
CHAPTER 7 EXTERNALS AND CONTROLS
7-17 P
5.3 PCBs
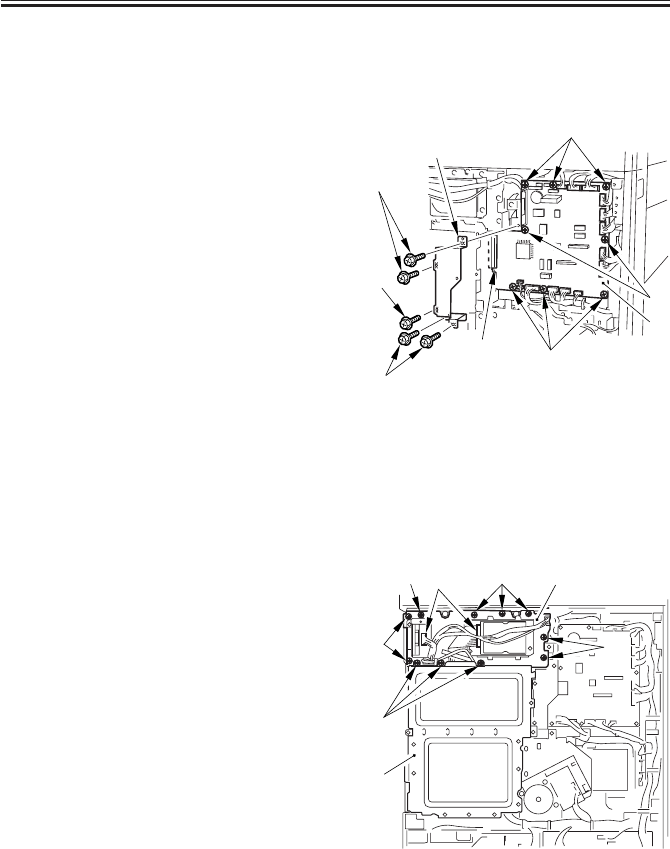
5.3.1 Removing the DC Controller PCB
1) Remove the rear cover. (7 screws)
2) Remove the five screws [1], and detach
the connector guard plate [2].
3) Disconnect all the connectors of the
harness.
4) Remove the eight screws [3].
5) Disconnect the connector [4] to the
main controller, and detach the DC con-
troller PCB [5].
F07-503-01
5.3.2 Points to Note When Replacing the DC Controller PCB
“Troubleshooting”>Chapter 4 “Troubleshooting Image Faults/Malfunctions” >6.7 “Vari-
able Resistors (VR), Light-Emitting Diodes, and Check Pins by PCB”
5.3.3 Removing the Controller Cover
1) Remove the rear cover. (7 screws)
2) Remove the 12 screws [1] (if the HDD
unit [2] has been removed, 9 screws);
then, detach the controller cover [3].
F07-503-02
[1]
[1]
[1]
[2]
[4]
[3]
[3]
[3]
[5]
[3]
[2]
[2]
[2] [2]
[2]
[4]
[4]
[1]


