


CASIO
2010080120100801
ε-4
Using the Setup Wizard
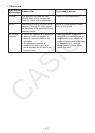
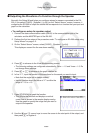
9. If there is no problem with the contents of the confirmation screen, press 1.
If you need to change the setup, press 6 or J. This will return to the screen in step 4
(for setting the total sampling interval), where you can change the setting.
• Pressing 1 will take you to the final Setup Wizard
screen.
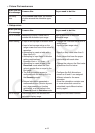
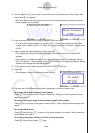
10. Press number keys described below to specify what you want to do with the setup you
have configured.
b(Start Setup) ................Starts sampling using the setup (page
ε-30)
c(Save Setup-MEM) .....Saves the setup (page
ε-24)
d(Convert Program) ......Converts the setup to a program (page
ε-27)
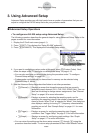
k Using Setup Wizard to Configure Settings for FFT (Frequency
Characteristics) Data Sampling
When you perform sound sampling executed by the EA-200’s built-in microphone (by
specifying [CASIO] - [Microphone] as the sensor), Setup Wizard will provide you with three
options: [Sound wave], [Sound wave & FFT], and [FFT only]. “Sound wave” records the
following two dimensions for the sampled sound data: elapsed time (horizontal axis) and
volume (vertical axis). “FFT” records the following two dimensions: frequency (horizontal
axis) and volume (vertical axis).
The following shows the settings for recording FFT data.
1. Perform the first two steps of the procedure under “To configure an EA-200 setup using
Setup Wizard” on page
ε-2.
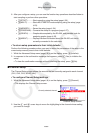
2. On the “Select Sensor” screen, select [CASIO] - [Microphone] - [Sound wave & FFT] or
[CASIO] - [Microphone] - [FFT only].
• This causes a “Select FFT Range” screen to appear.
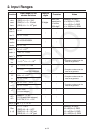
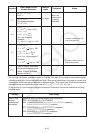
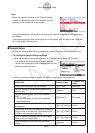
• You can select one of four settings for FFT Range. The setting you select will
automatically apply the applicable fixed parameters shown below.
Setting
Parameter
Frequency pitch
Upper limit of sampling frequency
Sampling interval
Number of samples
2 Hz
1000 Hz
8192
2 - 1000 Hz:
1
61 sec
μ
4 Hz
2000 Hz
8192
4 - 2000 Hz:
2
31 sec
μ
6 Hz
3000 Hz
8192
6 - 3000 Hz:
3
20 sec
μ
8 Hz
4000 Hz
4096
8 - 4000 Hz:
4
31 sec
μ
3. Use function keys 1 through 4 to select an FFT Range setting.
• Selecting an FFT Range causes the final Setup Wizard screen to appear.
4. Perform step 10 under “To configure an EA-200 setup using Setup Wizard” on page
ε-2
to finalize the procedure.