16-26
Cisco ASA Series Firewall ASDM Configuration Guide
Chapter 16 Using the Cisco Unified Communication Wizard
Working with Certificates in the Unified Communication Wizard
Submit the CSR to the certificate authority (CA), for example, by pasting the CSR text into the CSR
enrollment page on the CA website.
When the CA returns the signed identity certificate, rerun the Unified Communications Wizard. From
the client-side or remote-side certificate management step of the wizard, click Install ASA’s Identity
Certificate. See Installing the ASA Identity Certificate on the Mobility Advantage Server, page 16-26
and Installing the ASA Identity Certificate on the Presence Federation and Cisco Intercompany Media
Engine Servers, page 16-26 for the steps to install the identity certificate.
Installing the ASA Identity Certificate on the Mobility Advantage Server
When configuring certificates for the Cisco Mobility Advantage Proxy, you must install the ASA
identity certificate on the Cisco Mobility Advantage server.
Typically, a certificate authority returns two certificates: your signed identity certificate and the
certificate authority’s certificate (referred to as the root certificate). However, some certificate
authorities (for example, VeriSign) might also send you an intermediate certificate.
The root certificate from the certificate authority is used to sign other certificates. The root certificate is
used by the ASA to authenticate your signed identity certificate received from the certificate authority.
If the certificate authority provided an intermediate certificate, you must enter the certificate text in the
Intermediate Certificate (If Applicable) area of the Install ASA’s Identity Certificate dialog box.
For the Cisco Mobility Advantage Proxy, you install the root certificate in another dialog box. See
Installing a Certificate, page 16-23 for the steps to install the root certificate.
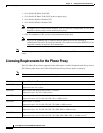
Step 1 In the Intermediate Certificate (If Applicable) area, perform on of the following actions:
• To add a certificate configuration from an existing file, click the Install from a file radio button (this
is the default setting). Enter the path and file name, or click Browse to search for the file. Then click
Install Certificate.
• To enroll manually, click the Paste the certificate data in base-64 format radio button. Copy and
paste the PEM format (base64 or hexadecimal) certificate into the area provided.
Step 2 In the ASA’s Identity Certificate area, perform on of the following actions:
• To add a certificate configuration from an existing file, click the Install from a file radio button (this
is the default setting). Enter the path and file name, or click Browse to search for the file. Then click
Install Certificate.
• To enroll manually, click the Paste the certificate data in base-64 format radio button. Copy and
paste the PEM format (base64 or hexadecimal) certificate into the area provided.
Step 3 Click Install Certificate.
Installing the ASA Identity Certificate on the Presence Federation and Cisco
Intercompany Media Engine Servers
When configuring certificates for the Cisco Presence Federation Proxy and Cisco Intercompany Media
Engine Proxy, you must install the ASA identity certificate and the root certificate on the Cisco Presence
Federation server and Cisco Intercompany Media Engine server, respectively.


