


Implementing OSPF on Cisco IOS XR Software
How to Implement OSPF on Cisco IOS XR Software
RC-160
Cisco IOS XR Routing Configuration Guide
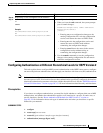
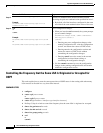
Creating a Virtual Link with MD5 Authentication to Area 0 for OSPF
This task explains how to create a virtual link to your backbone (area 0) and apply MD5 authentication.
You must perform the steps described on both ABRs, one at each end of the virtual link. To understand
virtual links, see the “Virtual Link and Transit Area for OSPF” section on page RC-138.
Note After you explicitly configure area parameter values, they are inherited by all interfaces bound to that
area—unless you override the values and configure them explicitly for the interface. An example is
provided in the “Virtual Link Configured with MD5 Authentication for OSPF Version 2: Example”
section on page RC-192.
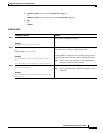
Prerequisites
Meet the following prerequisites before you create a virtual link with MD5 authentication to area 0:
• Have the router ID of the neighbor router at the opposite end of the link to configure the local router.
You can use the show ospf or show ospfv3 command on the remote end to get its router ID.
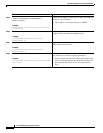
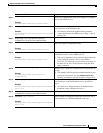
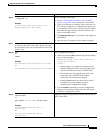
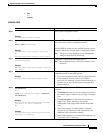
Step 7
timers lsa group-pacing
seconds
Example:
RP/0/RP0/CPU0:router(config-ospf)# timers lsa
group-pacing 1000
Changes the interval at which OSPF link-state LSAs are
collected into a group for flooding. The default is 240
seconds.
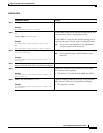
Step 8
end
or
commit
Example:
RP/0/RP0/CPU0:router(config-ospf)# end
or
RP/0/RP0/CPU0:router(config-ospf)# commit
Saves configuration changes.
• When you issue the end command, the system prompts
you to commit changes:
Uncommitted changes found, commit them before
exiting(yes/no/cancel)?
[cancel]:
–
Entering yes saves configuration changes to the
running configuration file, exits the configuration
session, and returns the router to EXEC mode.
–
Entering no exits the configuration session and
returns the router to EXEC mode without
committing the configuration changes.
–
Entering cancel leaves the router in the current
configuration session without exiting or
committing the configuration changes.
• Use the commit command to save the configuration
changes to the running configuration file and remain
within the configuration session.
Command or Action Purpose