


DGB
1-8
ba
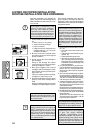
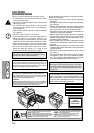
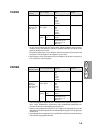
LOADING COPY PAPER
KOPIERPAPIER EINLEGEN
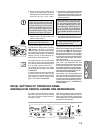
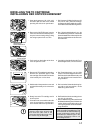
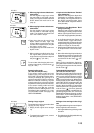
4. Adjust the paper guides on the paper
tray to the copy paper width and
length. Squeeze the lever of paper
guide a and slide the guide to match
with the width of the paper.
Move paper guide b to the appropri-
ate slot as marked on the tray.
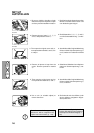
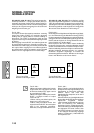
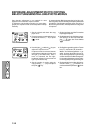
1. Raise the handle of the paper tray and
pull the paper tray out until it stops.
5. Fan the copy paper and insert it into
the tray. Make sure the edges go
under the corner hooks.
Do not load paper above the
maximum height line (
).
Exceeding the line will cause a
paper misfeed.
6. Gently push the paper tray back into
the copier.
After loading copy paper, to
cancel the blinking "P" without
restarting copying, press the
clear (
>
) key. The "P" in the
display will go out and the rea-
dy (
) indicator will light up.
4. Die Papierführungen des Papierfachs
auf die Länge und Breite des Kopier-
papiers einstellen. Dazu den Hebel
der Papierführung a drücken und die
Führung passend zur Breite des Ko-
pierpapiers verschieben.
Die Papierführung b zum geeigne-
ten Schlitz schieben, wie auf dem
Papierfach gekennzeichnet.
1. Den Griff des Papierfachs anheben
und das Papierfach bis zum Anschlag
herausziehen.
2. Die Verriegelung der Druckplatte entfer-
nen. Die Verriegelung der Druckplatte
entfernen. Dazu die Verriegelung in
Pfeilrichtung drehen und gleichzeitig
die Druckplatte des Papierfachs nach
unten drücken.
5. Das Kopierpapier auffächern und in
das Papierfach einlegen. Darauf ach-
ten, daß sich die Kanten unter den
Haken an den Ecken befinden.
Kopierpapier nur bis zur Mar-
kierung für die maximale Füll-
höhe einlegen (
). Zu hohe
Füllung kann einen Papierstau
verursachen.
6. Das Papierfach vorsichtig in den Ko-
pierer zurückschieben.
Um nach dem Einlegen des
Kopierpapiers das blinkende
„P“ ohne Starten eines Kopier-
vorgangs zu löschen, die Rück-
stelltaste (
>
) drücken. Das
blinkende „P“ auf der Anzeige
erlischt, und die Bereitschafts-
anzeige (
) leuchtet auf.
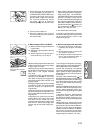
3. Die Verriegelung der Druckplatte, die in
Schritt 2 entfernt wurde und die Schrau-
be, die beim Auspacken entfernt
wurde, an der Vorderseite des Papier-
fachs aufbewahren. Die Verriegelung
der Druckplatte am Aufbewahrungsort
festdrehen.
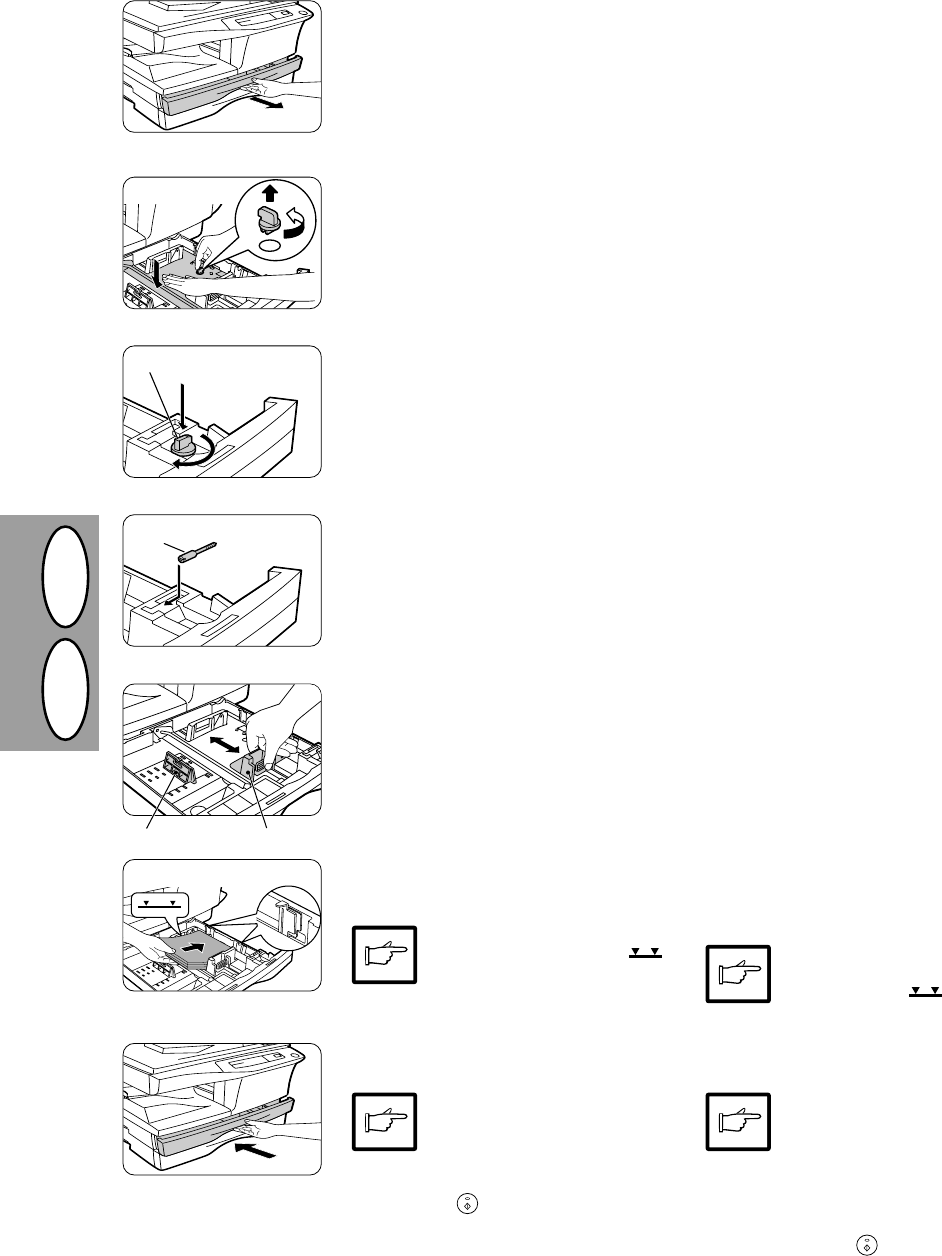
2. Remove the pressure plate lock. Ro-
tate the pressure plate lock in the
direction of the arrow to remove it while
pressing down the pressure plate of
the paper tray.
3. Store the pressure plate lock which has
been removed in step 2 and the screw
which has bee removed during unpack-
ing in the front of the paper tray. To
store the pressure plate lock, rotate the
lock to fix it on the relevant location.
Screw/Schraube
Verriegelung der Druckplatte
Pressure plate lock