7. Connect any cables that should be attached to the card.
See the documentation that accompanied the card for information about its cable connections.
8. Stand the system upright.
9. Install the cover (see "Installing the Cover" in "Troubleshooting Your System").
10. Reconnect the system to its electrical outlet and turn the system on, including any attached peripherals.
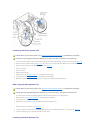
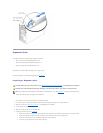
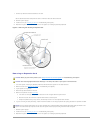
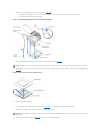
Figure 6-3. Removing and Installing an Expansion Card
Removing an Expansion Card
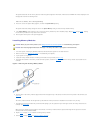
1. Turn off the system, including any attached peripherals, and disconnect the system from the electrical outlet.
2. Remove the cover (see "Removing the Cover" in "Troubleshooting Your System").
3. Lay the system on its right side.
4. Disconnect any cables attached to the card.
5. Remove the expansion card (see Figure6-3):
a. If the card is a full-length card, press the release tab on the card-guide latch and open the latch.
b. Remove the screw that secures the expansion-card bracket to the back panel.
c. Grasp the expansion card by its top corners, and carefully remove it from the expansion-card connector.
6. If you are removing the card permanently, install a metal filler bracket over the empty expansion slot opening and close the expansion-card latch.
7. Stand the system upright.
8. Install the cover (see "Installing the Cover" in "Troubleshooting Your System").
9. Reconnect the system to its electrical outlet and turn the system on, including any attached peripherals.
CAUTION: Before you perform this procedure, see "Safety First—For You and Your System" in "Troubleshooting Your System."
CAUTION: See "Protecting Against Electrostatic Discharge" in the safety instructions in your System Information Guide.
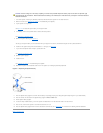
NOTICE: You must install a filler bracket over an empty expansion slot to maintain Federal Communications Commission (FCC) certification of the
system. The brackets also help keep dust and dirt out of the system and aid in proper cooling and airflow inside the system.


