


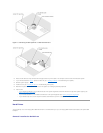
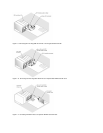
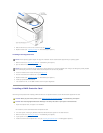

4. Slide the hard drive out until it is free of the drive bay (see Figure7-14).
5. Replace the bezel (see "Installing the Bezel" in "Troubleshooting Your System").
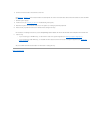
Installing a Hot-Plug Hard Drive
1. Remove the bezel (see "Removing the Bezel" in "Troubleshooting Your System").
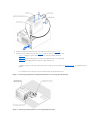
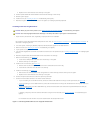
2. Open the hard-drive carrier handle (see Figure7-14).
3. Insert the hard-drive carrier into the drive bay (see Figure7-14).
4. Close the hard-drive carrier handle to lock it in place.
5. Replace the bezel (see "Installing the Bezel" in "Troubleshooting Your System").
6. Install any required SCSI device drivers.
7. If the hard drive is new, run the SCSI controllers test in the system diagnostics.
Installing a RAID Controller Card
Follow this general procedure when installing a RAID controller card. For specific instructions, see the documentation supplied with the card.
1. Unpack the expansion card, and prepare it for installation.
For instructions, see the documentation that accompanied the card.
2. Turn off the system, including any attached peripherals, and disconnect the system from the electrical outlet.
3. Remove the cover (see "Removing the Cover" in "Troubleshooting Your System").
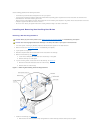
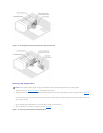
4. Lay the system on its right side.
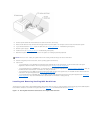
5. Install the controller card in expansion slot 1 or 2 (see "Installing an Expansion Card" in "Installing System Options").
NOTICE: Not all operating systems support hot-plug drive installation. See the documentation supplied with your operating system.
NOTICE: Do not insert a hard-drive carrier and attempt to lock its handle next to a partially installed carrier. Doing so can damage the partially installed
carrier's shield spring and make it unusable. Ensure that the adjacent drive carrier is fully installed.
CAUTION: Before you perform this procedure, see "Safety First—For You and Your System" in "Troubleshooting Your System."
CAUTION: See "Protecting Against Electrostatic Discharge" in the safety instructions in your System Information Guide.