


Installing System Components 103
3
Remove the cooling shroud. See "Removing the Cooling Shroud" on
page 60.
4
Locate the battery socket. See "System Board Connectors" on page 127.
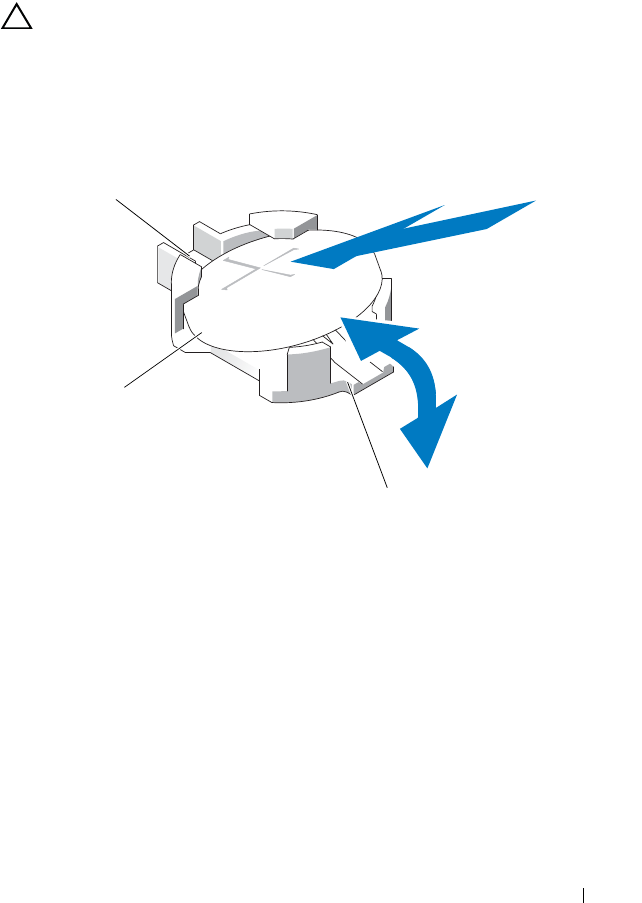
CAUTION: To avoid damage to the battery connector, you must firmly support the
connector while installing or removing a battery.
5
Slide the battery toward the positive side of the connector and lift it out of
the securing tabs at the negative side of the connector.
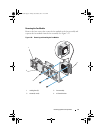
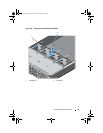
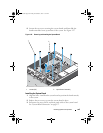
Figure 3-26. Removing and Installing the System Battery
Installing the System Battery
1
Hold the battery with the "+" facing up, and slide it under the securing
tabs at the positive side of the connector.
2
Press the battery straight down into the connector until it snaps into place.
3
Install the cooling shroud. See "Installing the Cooling Shroud" on page 61.
4
Close the system. See "Closing the System" on page 59.
1 positive side of battery connector 2 system battery
3 negative side of battery connector
1
2
3
book.book Page 103 Friday, November 8, 2013 11:29 AM