xStack
®
DES-3200-10/18/28/28F Layer 2 Ethernet Managed Switch User Manual
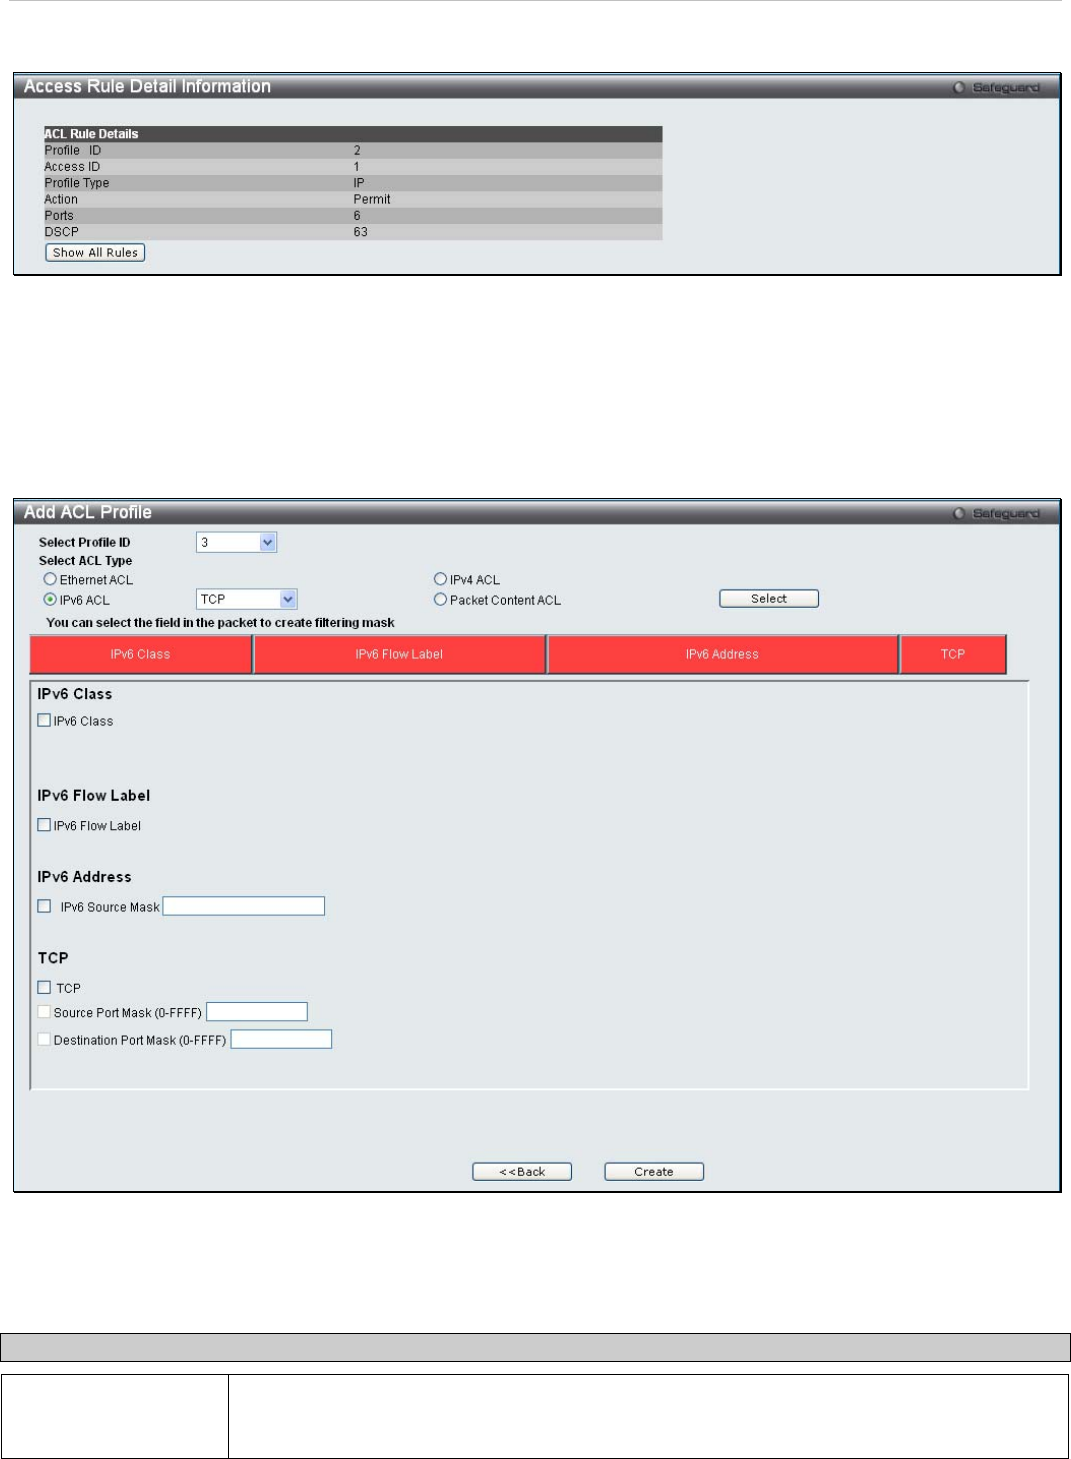
To view the configurations for a previously configured rule, click on the corresponding Show Details button, which will
display the following Access Rule Detail Information window:
Figure 6 - 15. Access Rule Detail Information window for IPv4 example
To create an IPv6 ACL, click Add ACL Profile in the Access Profile List window and then use the drop-down menu
to select a Profile ID between 1 and 512, click the IPv6 ACL radio button, and then use the drop-down menu to select
a protocol TCP or UDP. Click Select and the following window will appear (this window will vary depending on
whether TCP or UDP has been selected):
Figure 6 - 16. Add ACL Profile window for IPv6 example
Click on the boxes at the top of the table, which will then turn red and reveal parameters for configuration. To create a
new entry enter the correct information and click Create. To return to the Access Profile List window, click <<Back.
The following parameters can be set for IPv6:
Parameter Description
IPv6 Class
Ticking this check box will instruct the Switch to examine the class field of the IPv6 header.
The class field is a part of the packet header that is similar to the Type of Service (ToS) or
Precedence bits field in IPv4.
160


