46 Operation
UM5C05C P0745680 Standard 6.00 October 2001 Emerson Energy Systems
5.2. Starting up and adjusting
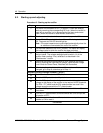
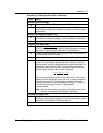
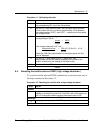
Procedure 9 - Starting up the rectifier
Step Action
1
Put the dc circuit breaker to OFF ( 0 position ). Open the sensing
leads by removing the corresponding RC fuse ( when the rectifier is
used with a controller ) or by disconnecting the alarm and control
cable ( when the rectifier is used without a controller ).
2
Put the ac circuit breaker in the main ac service panel to ON.
3
Put the 25 A, 3Ø, ac circuit breaker of the rectifier being tested to
ON. The green ac ON LED should light up.
Note : The output capacitors are precharged automatically when the
dc cables are connected at the rear of the rectifier.
4
Put the meter selector to the VOLT position. The meter will display
the voltage value to which the rectifier has been adjusted.
5
Connect a digital multimeter to test points VOUT+ and VOUT– on
the front panel. The voltage reading should be within 1% of the
rectifier meter reading. If not, calibrate it as described in the
“ Maintenance ” section.
6
Determine the system requirements for float, equalize and HVSD
limits by referring the User Manual Voltage_Level entitled Voltage
Level Limits for Power Plants, Rectifiers and Controllers.
7
If the factory threshold limits of the rectifier must be verified or
changed, go to Step 8; otherwise go to Step 14.
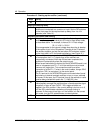
Adjusting the high voltage shutdown ( HVSD )
8
Put the dc circuit breaker to OFF ( O ).
9
Turn the HVSD potentiometer fully clockwise.
10
Turn the FLT potentiometer slowly clockwise to set the output
voltage on the display of the rectifier to the required HVSD threshold.
The EQL / FLT switch and the EQL potentiometer are used if the
voltage cannot be set with the FLT potentiometer.
11
Turn the HVSD potentiometer counterclockwise until the rectifier
shuts down.
12
Turn the FLT potentiometer counterclockwise two turns and put the
ac breaker to OFF.
13
Wait a few seconds for the rectifier to shut down and put the ac
breaker to ON to reset it.
continued


