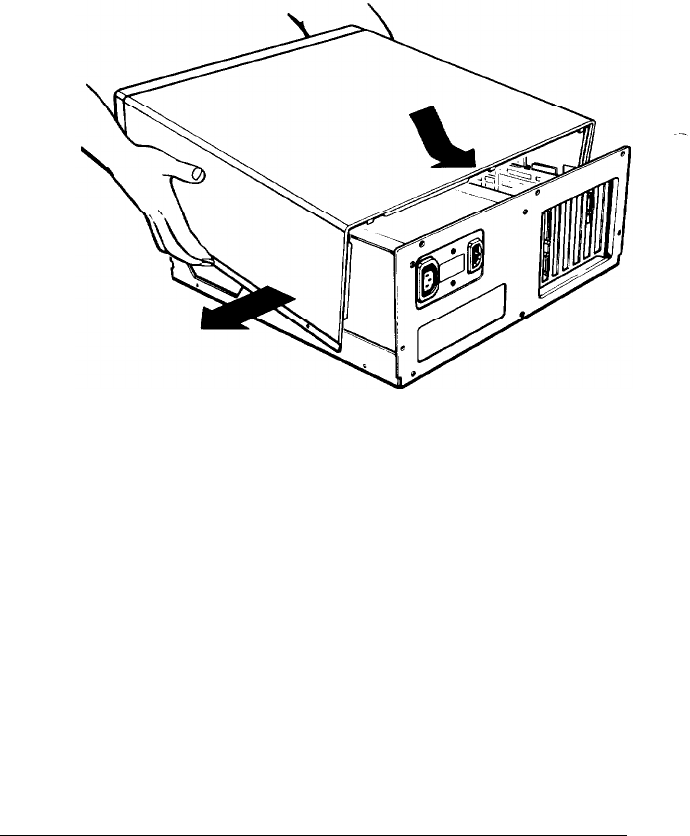
Replacing the Cover
After you install (or remove) an option card, follow these steps
to replace the computer’s cover:
1.
Facing the front of the computer, position the cover on the
computer as shown below. Pull the cover’s sides outward
slightly.
2.
Lower the cover and slide it toward the back of the
computer until it fits into place. The diskette drive fits
through the opening in the front panel and the power
button fits into its cover.
3. To secure the cover, replace the five screws on the back
panel and the two screws on each side panel.
4. Return the computer to its original position and place the
monitor on top, if that is where you use it. Then reconnect
the computer to the monitor, printer, keyboard, and any
other peripherals you have.
5-22 Installing Options


