


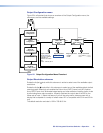
ISS 408 Integrated Seamless Switcher • Operation 14
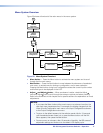
Front Panel Operations
The following paragraphs detail the power-up process and then describe input selection,
preset selection, Auto-Imaging, and then details the menu system, the picture adjustments,
and selection of executive mode.
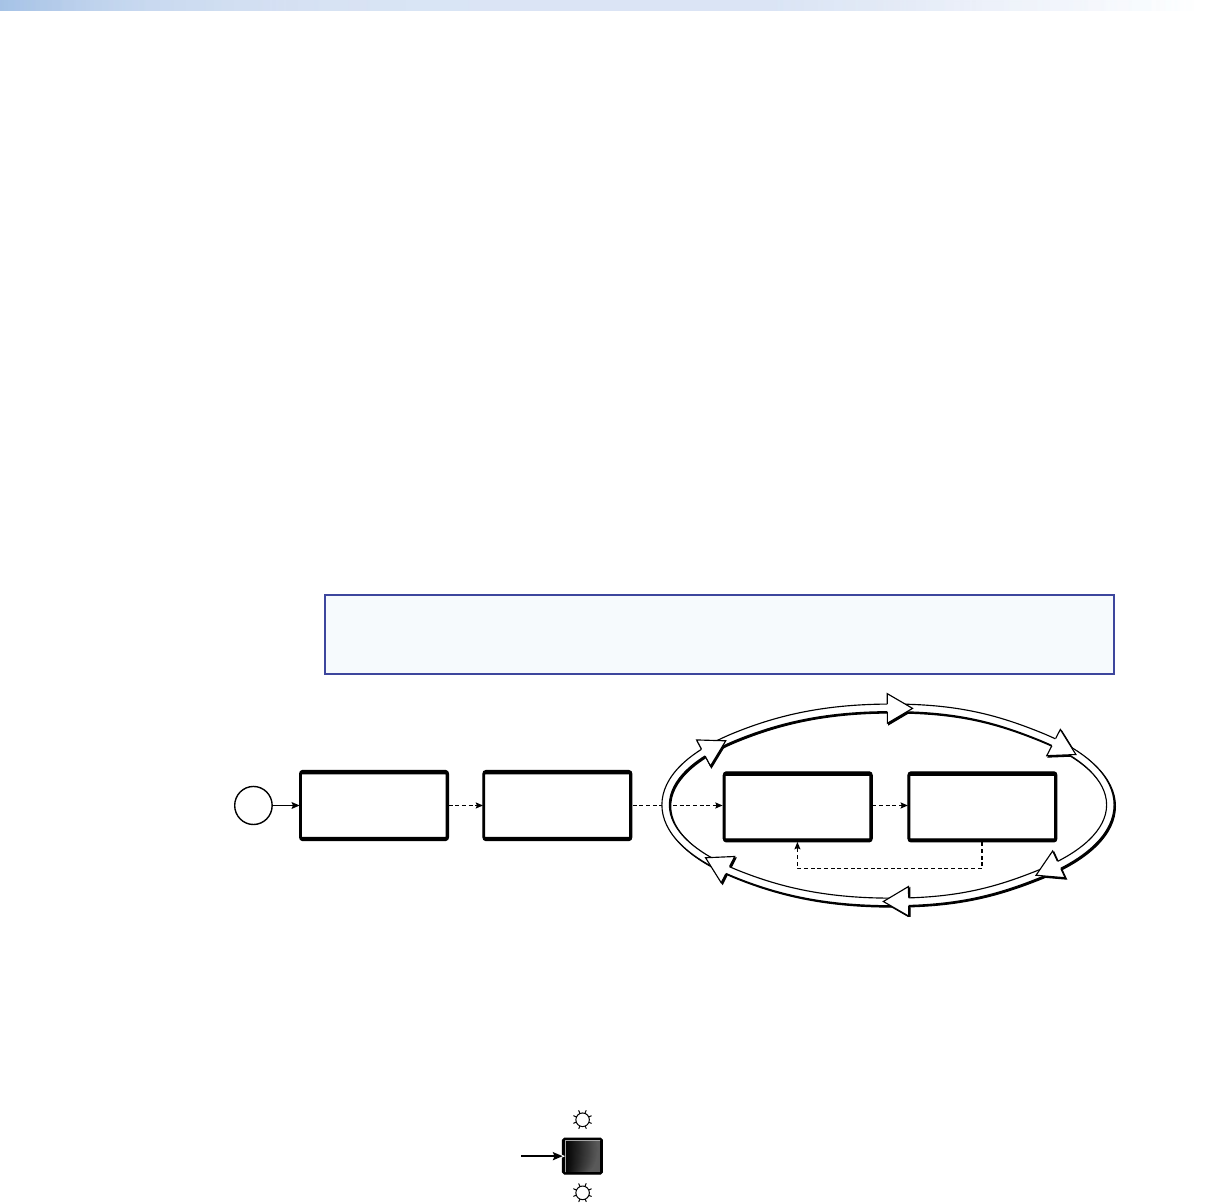
Power-on Indications
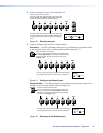
Power is automatically applied when the power cord is connected to an AC source. When
AC power is applied, the switcher performs a self-test that blinks all of the front panel LEDs
and then lights only the LEDs for the inputs previously selected for the preview output
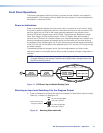
(blinking LED[s]) and program output (solid LED[s]). The self-test also displays the model
name, part number, and the firmware version in the LCD display. After approximately 2
seconds, the LCD reverts to its default display cycle, alternating between two displays: one
showing the selected program and preview inputs and their rates, and the other showing
the selected output rate (see figure 14). An error-free power up self-test sequence leaves all
of the LEDs off, with the exception of the selected input’s LED, and the LCD cycling through
the default displays.
The selected preview and program inputs, the picture adjustments, and other current
settings are saved in nonvolatile memory. When power is applied, the latest configuration is
retrieved.
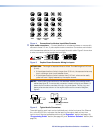
NOTE: On figure 14 and all other flowcharts in this chapter, solid lines indicate screen
changes initiated by the operator. Dashed lines indicate screen changes that are the
result of a timeout function.
2
sec.
2
sec.
2
sec.
2
sec.
Extron Electronics
ISS 408
Integration
Seamless Switcher
Extron Electronics
ISS 408
60-423-01
Version
x
.
xx
Program #1 RGB
0.00 kHz 0.00Hz
Preview #3 S-Video
0.00 kHz 0.00Hz
Output Rate
1280 x 1024 @ 60
Power
on
Default Display Cycle
Figure 14. LCD Power Up and Default Display Cycle
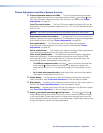
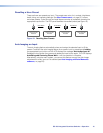
Selecting an Input and Switching It to the Program Output
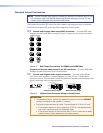
1. Press and release the Video/Audio button as necessary to select either video and audio,
video only, or audio only (see figure 15).
VIDEO
AUDIO
Press the button to cycle
through the selections.
The video LED lights green
when video is selected.
The audio LED lights red
when audio is selected.
Figure 15. Selecting Video and Audio