PAPER HANDLING
Loading Continuous Forms (Front Feed)
This section explains how to use continuous forms as the tractor unit is
installed at the front of the printer. The tractor unit pushes continuous
forms. This condition applies when you first purchase the printer.
Up to 8-ply media can be fed by the front tractor unit.
You can use continuous forms paper even if you have a cut sheet feeder
installed at the rear of the printer.
To load continuous forms paper:
1. Make sure that the printer is turned on. Remove any single-sheet
paper from the printer.
2. Lift up the paper table as shown below.
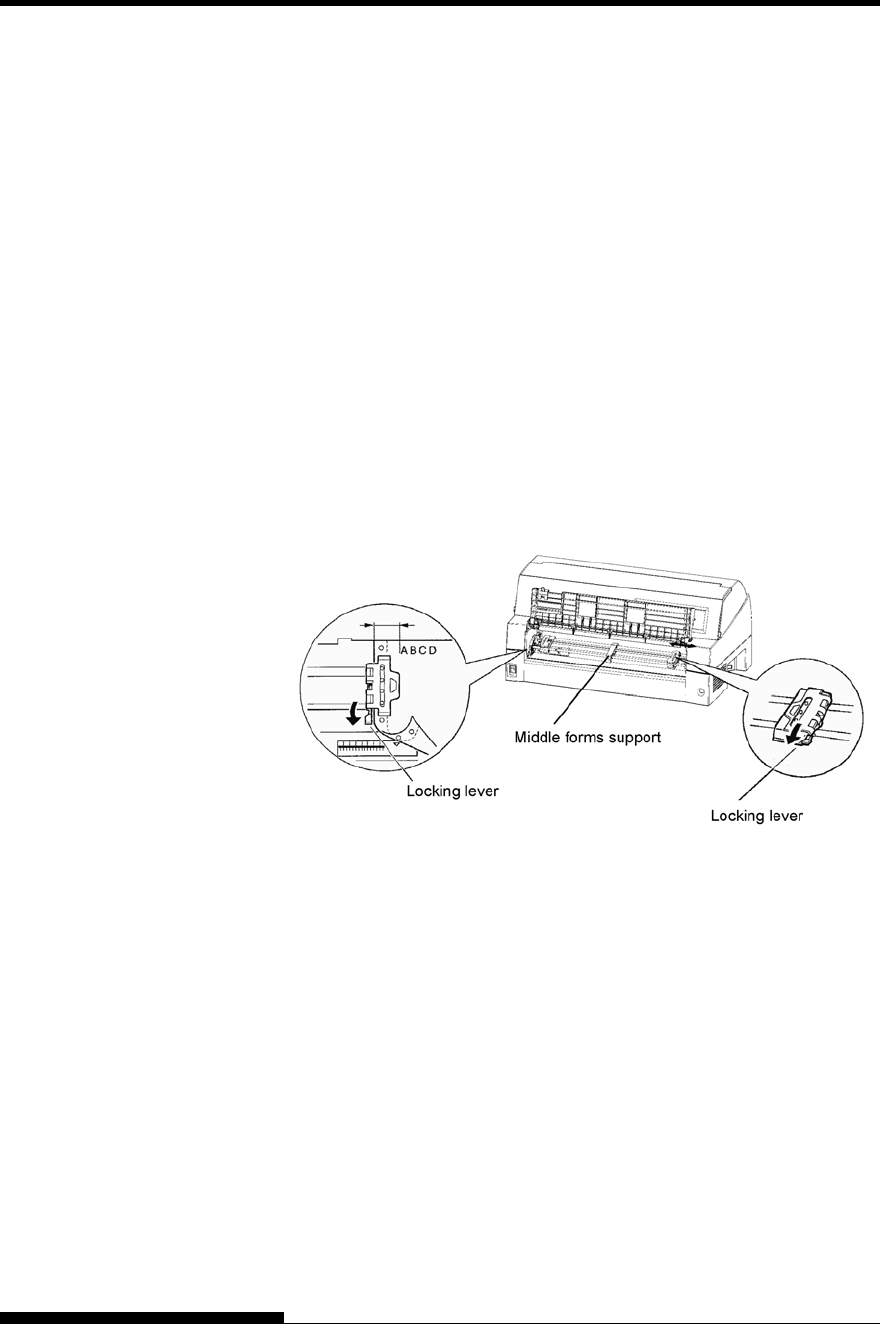
3. Release the tractor locking levers by pulling them up. Open the
tractor paper holders. See the following figure.
4. Position the left tractor. Push the left locking lever down to
secure the tractor. Center the middle forms support.
Positioning the tractors
5. Adjust the left margin.
Below the left tractor, there is a tractor guide, short inch-based
ruler graduated in 10 columns per inch. Use the ruler to help
position the tractor. When the paper edge is positioned to the
zero line, the left margin is 12 mm (0.5 inch) including
perforation area and the arrow indicates the location of the first
character.
6. Fit the paper feed holes onto the left and right tractor pins.
Adjust the right tractor to the width of the form. Close the paper
holders.
3-16 User's Manual


