


CHAPTER 2: Getting Started
20
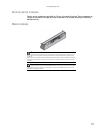
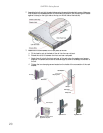
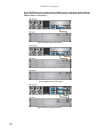
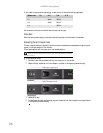
2 Assemble the left and right chassis latches using the special chassis latch screws. Make sure
that the latch is orientated as shown in the following illustration, with the spring arm located
against its stop (on the right side at the top, on the left side at the bottom).
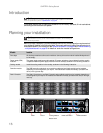
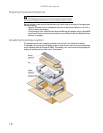
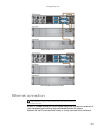
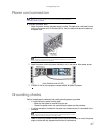
3 Assemble the rack brackets to the rack posts as follows:
a Fit the location pin at the back of the rail into the rear rail post.
b Extend the rail to fit between the front and rear rack posts.
c Attach the rail to both the front and rear of the rack using the washers and screws
supplied. The screws should be left loose enough to allow for sideways movement of
the rail.
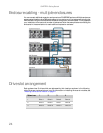
d Tighten the two clamping screws located on the inside of the rear section of the rack
bracket.
Remove the nut when you use
tapped hole rack posts.
Rear rack post
Clamping screws
Rack bracket
Guide pin
Front rack post
Square hole rack
Tapped hole rack
Phillips screw
Slide washer
Guide pin