


122 Chapter2
Opening Your Personal Workstation and Installing Accessories
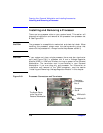
Installing and Removing a Processor
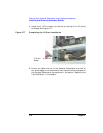
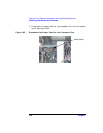
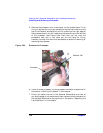
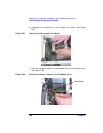
5. Remove the processor from its connector on the system board. To do
this, pull outward on the right connector’s retainer tab (relative to the
top of the Personal Workstation) and lift upward on the right edge of
the processor board. You will need to do the same thing to the left side
of the processor. See Figure 2-84. Note that you can hold the
processor’s heat sink in the hand you are not using for lifting;
however, the heat sink should not be used as a handle for removing or
replacing the processor.
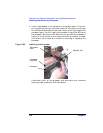
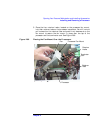
Figure 2-84 Remove the Processor
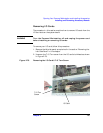
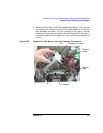
6. Install the new processor into the processor connector as explained in
the section “Installing a Processor” in this chapter.
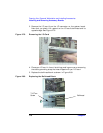
7. Ensure all cables internal to the Personal Workstation are clear of
any sharp edges or hot components. Next replace the left-side panel of
the Personal Workstation as explained in the section “Replacing the
Left-Side Panel” in this chapter.
Retainer Tab
Processor